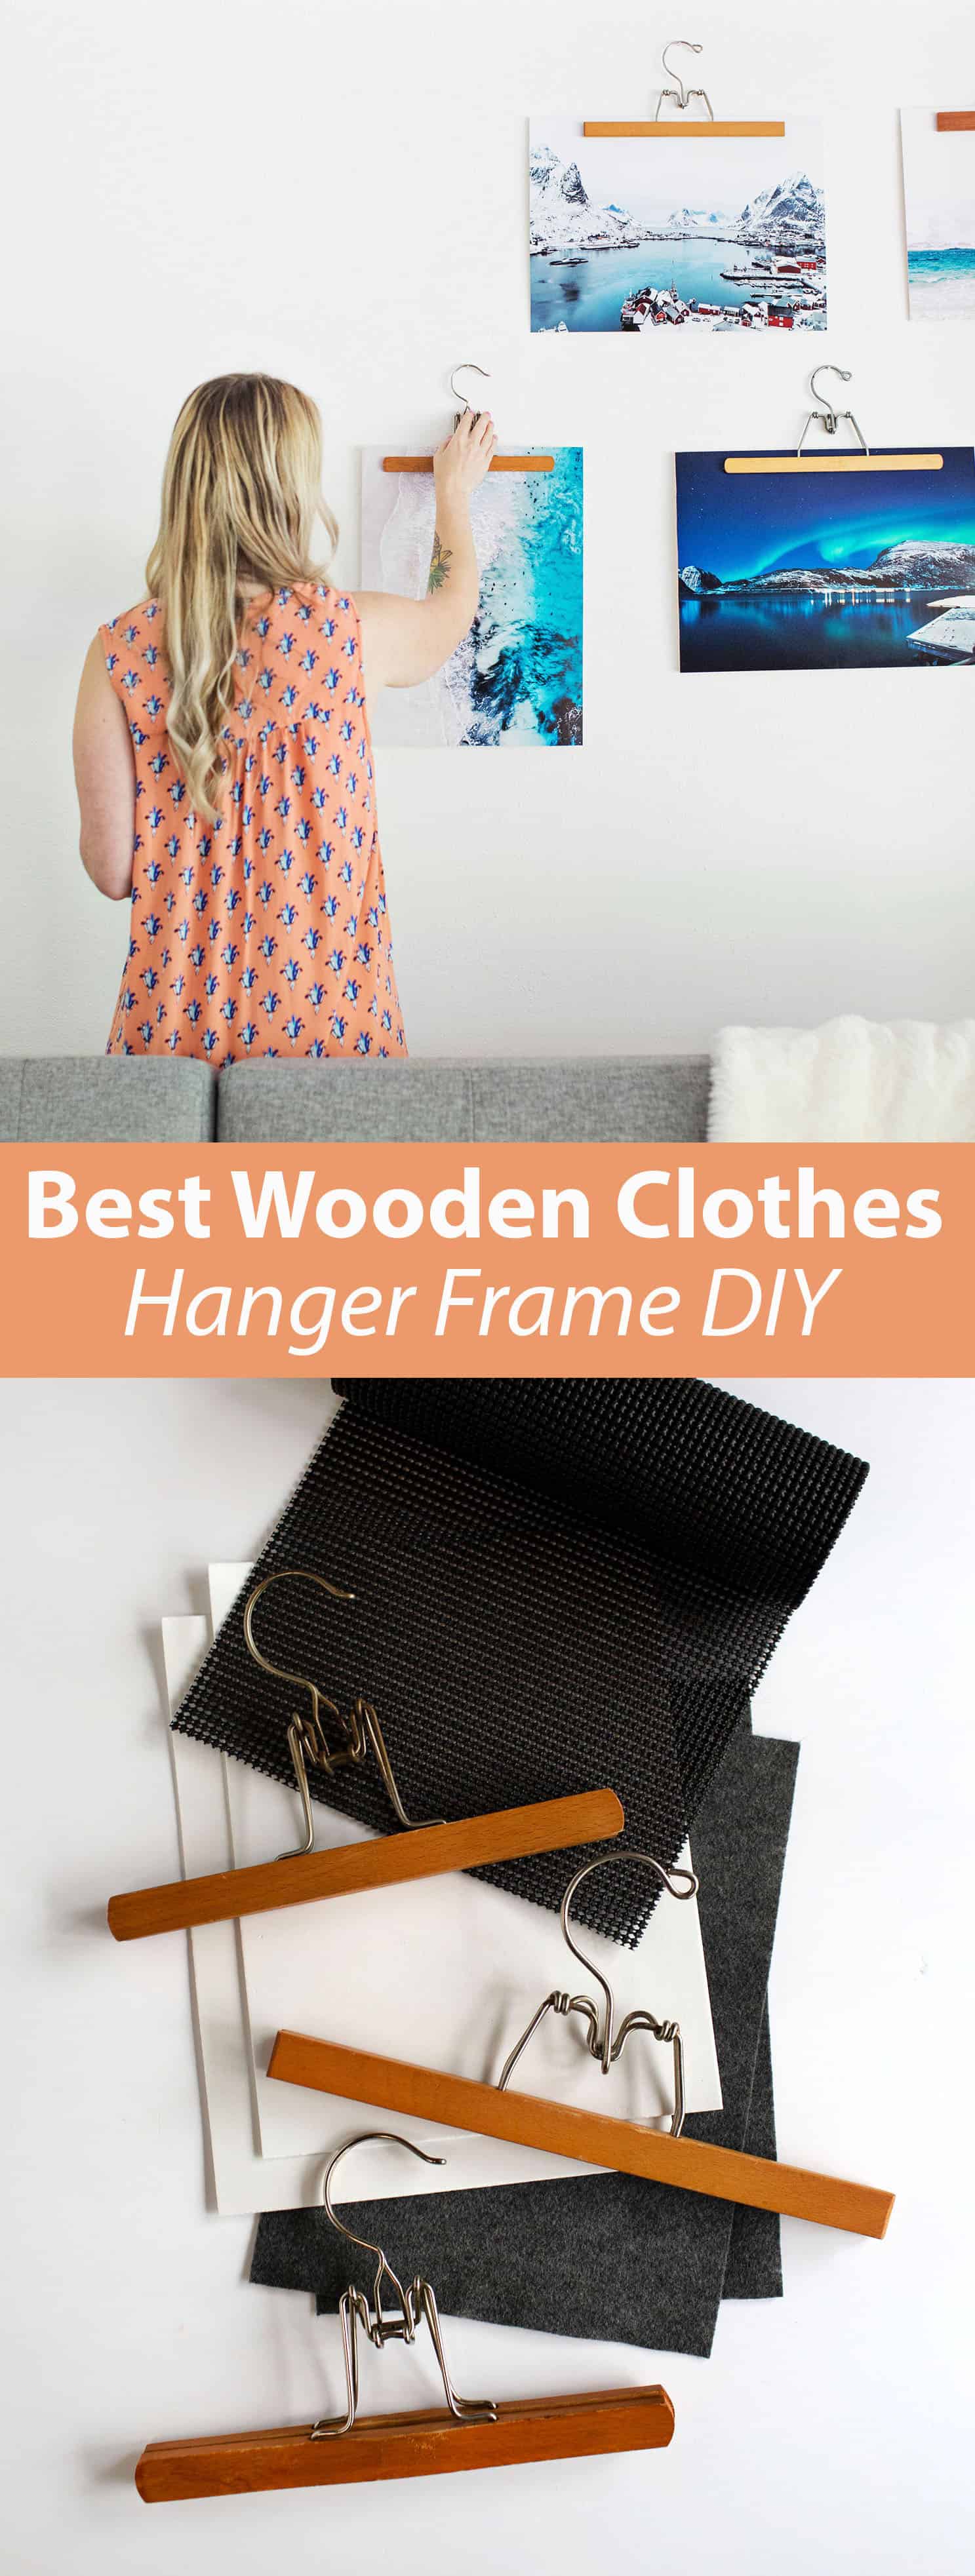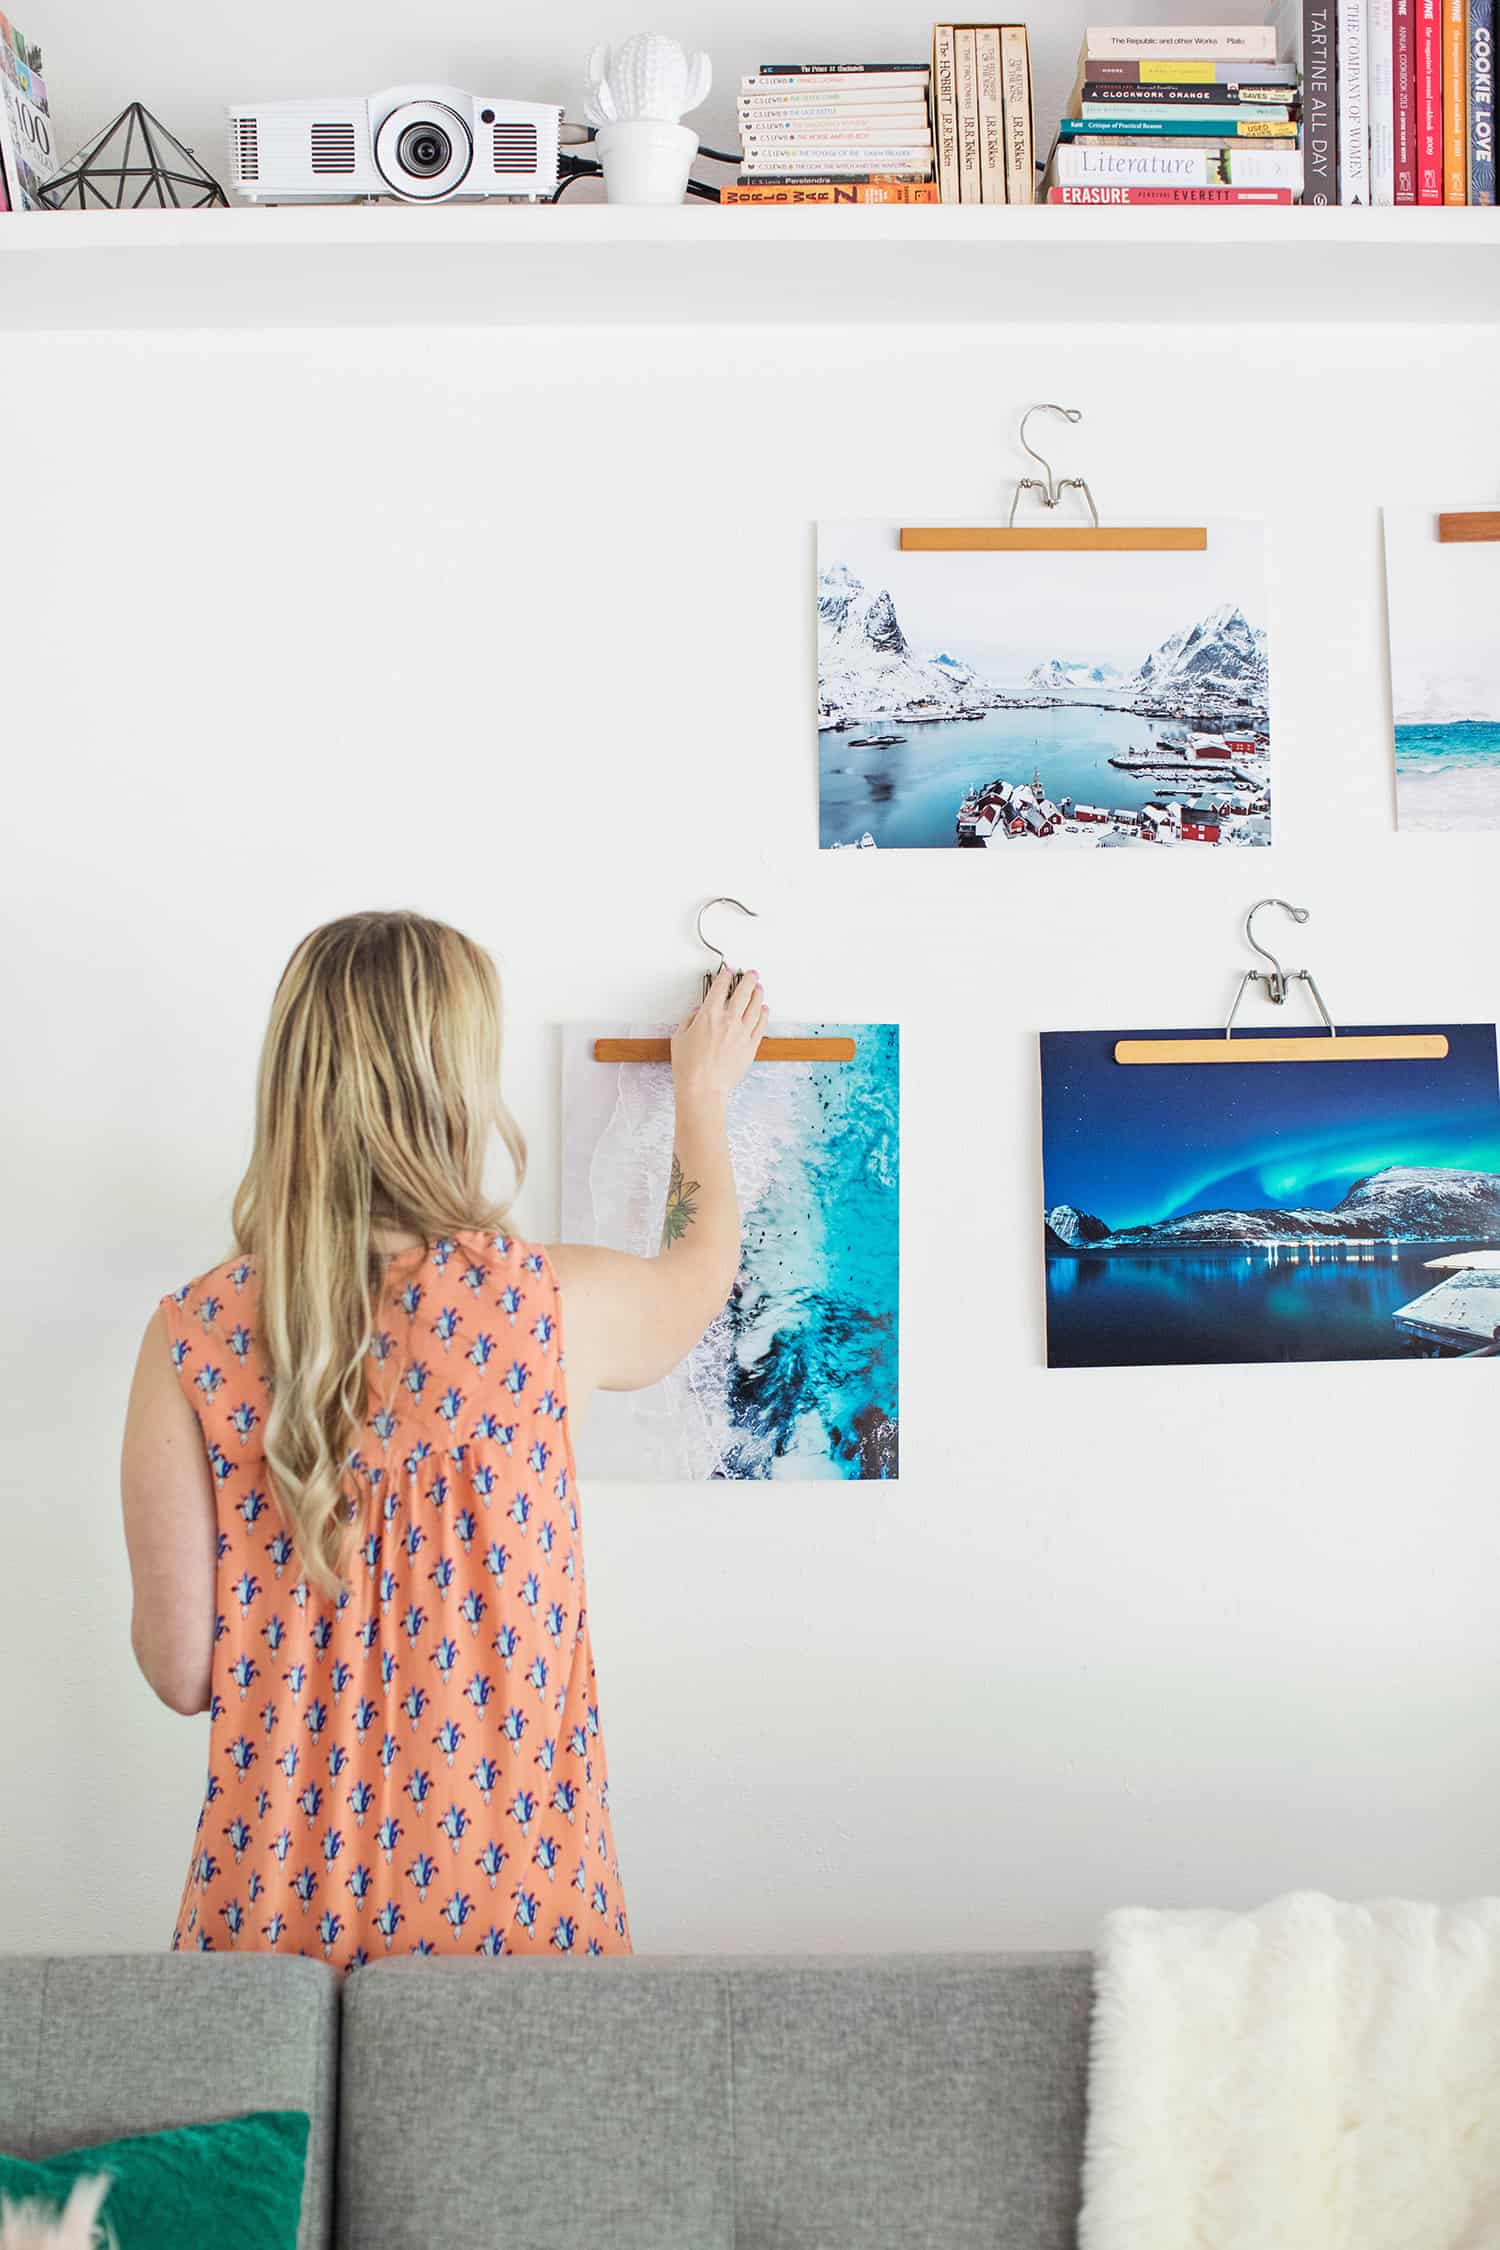
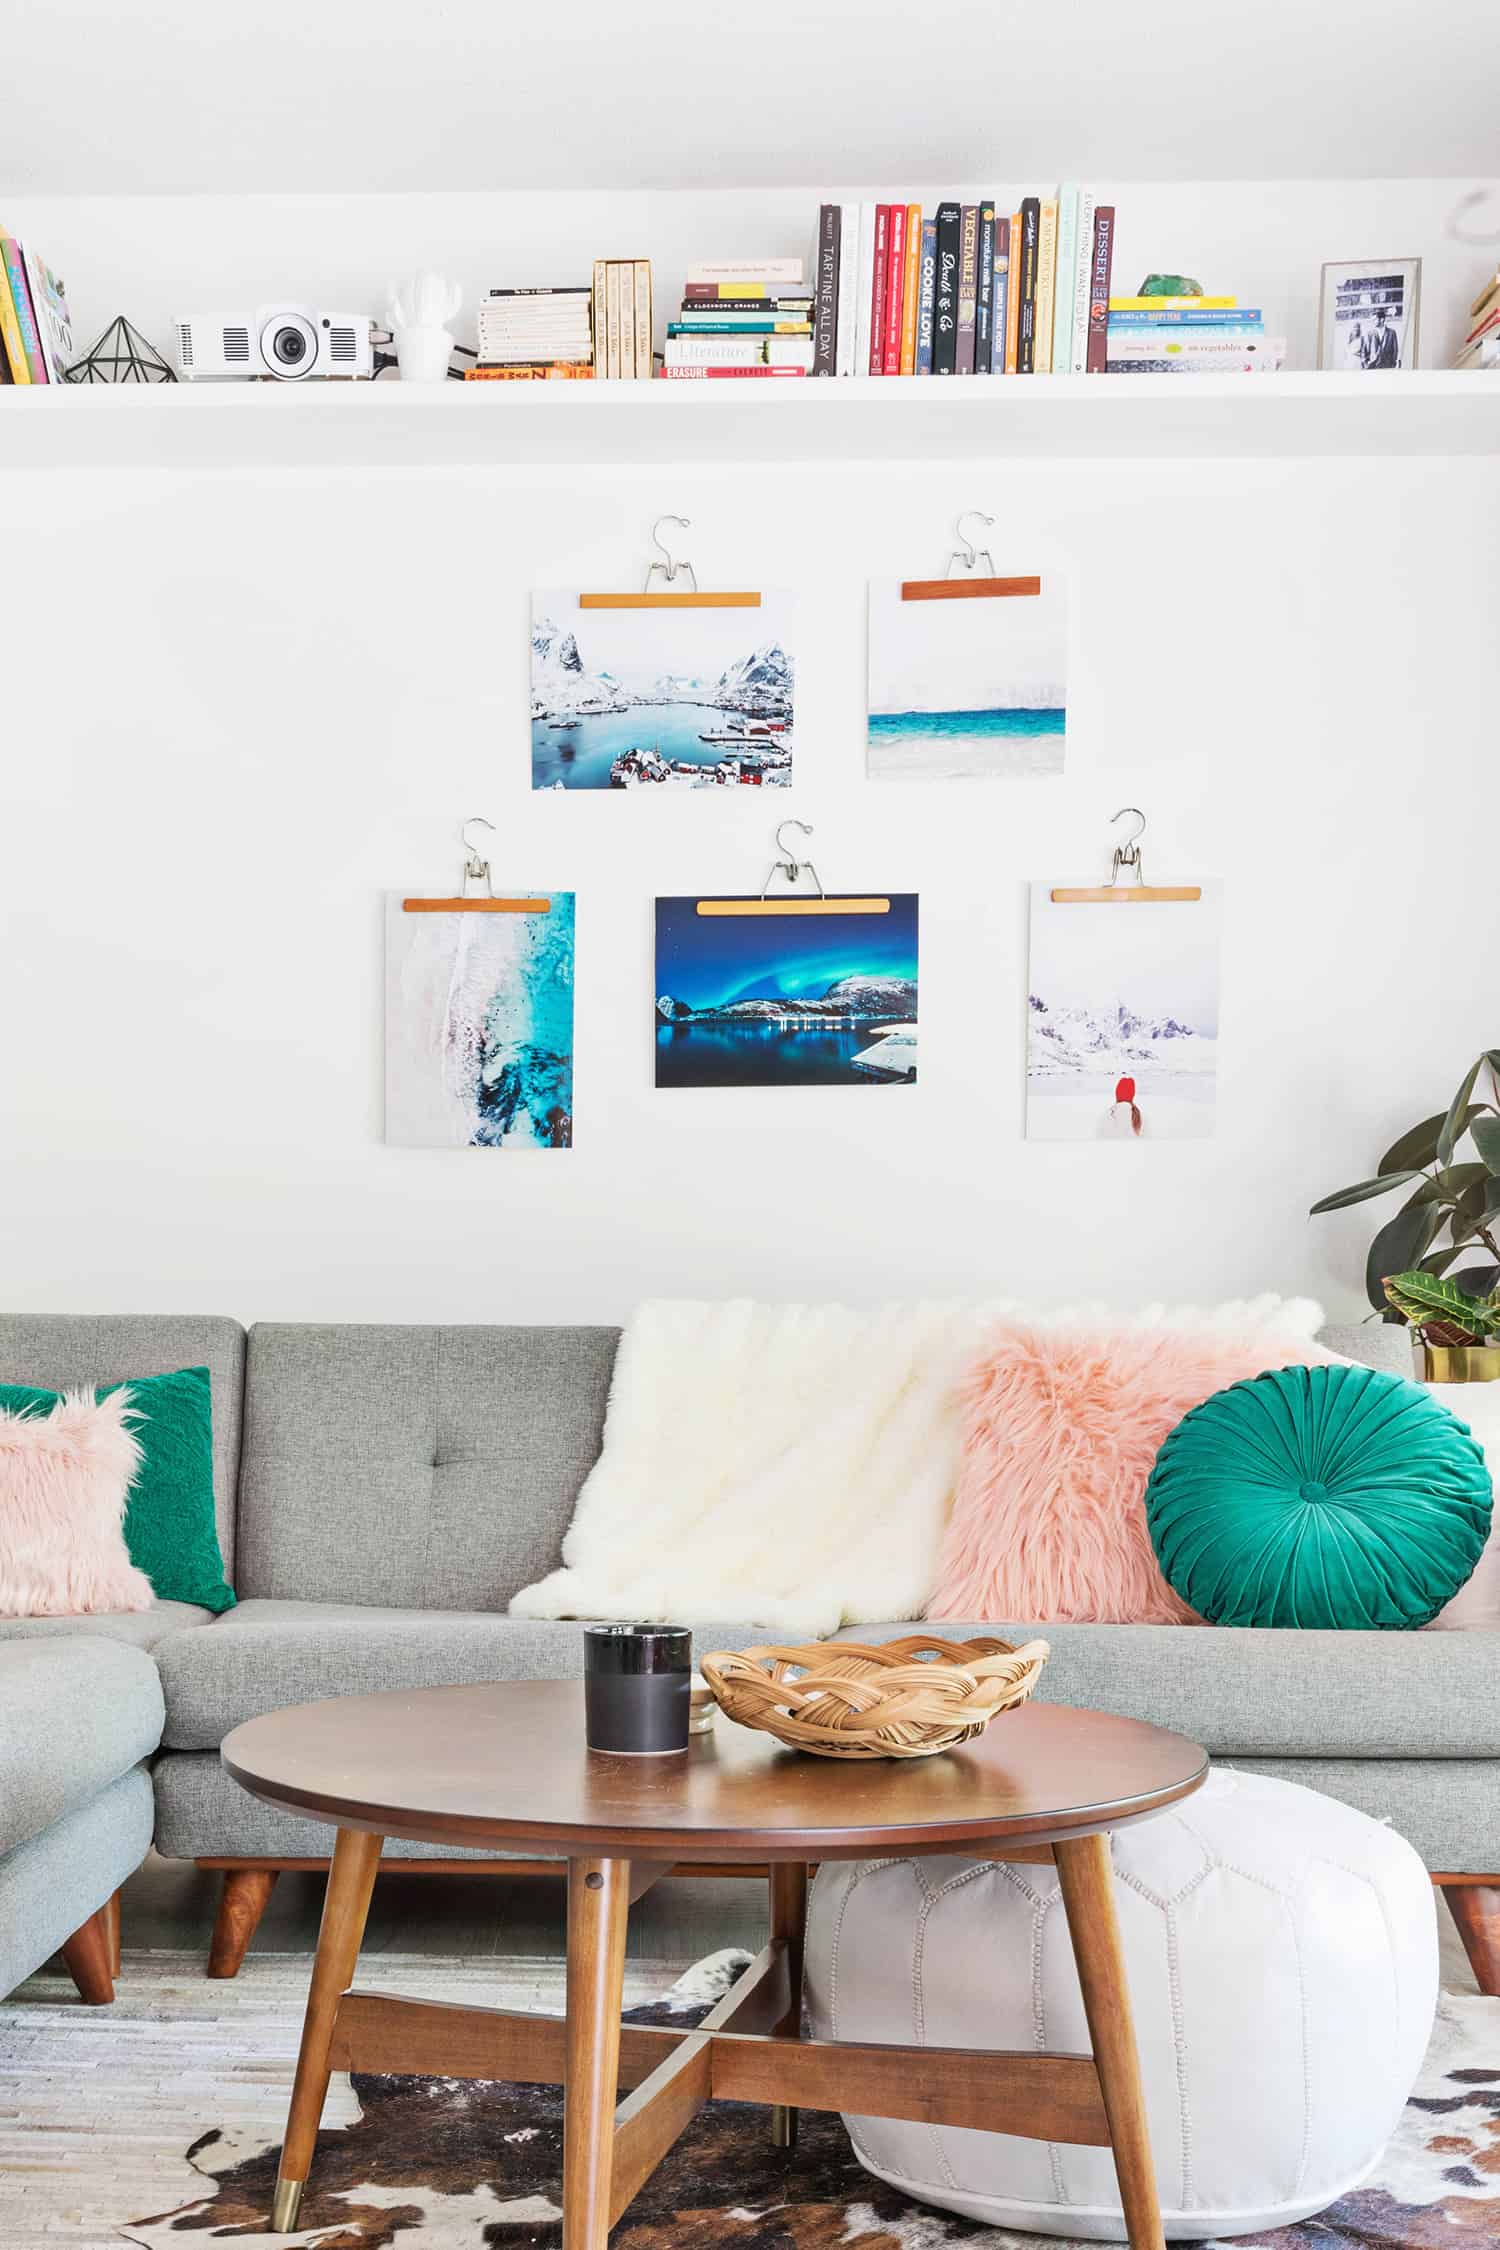
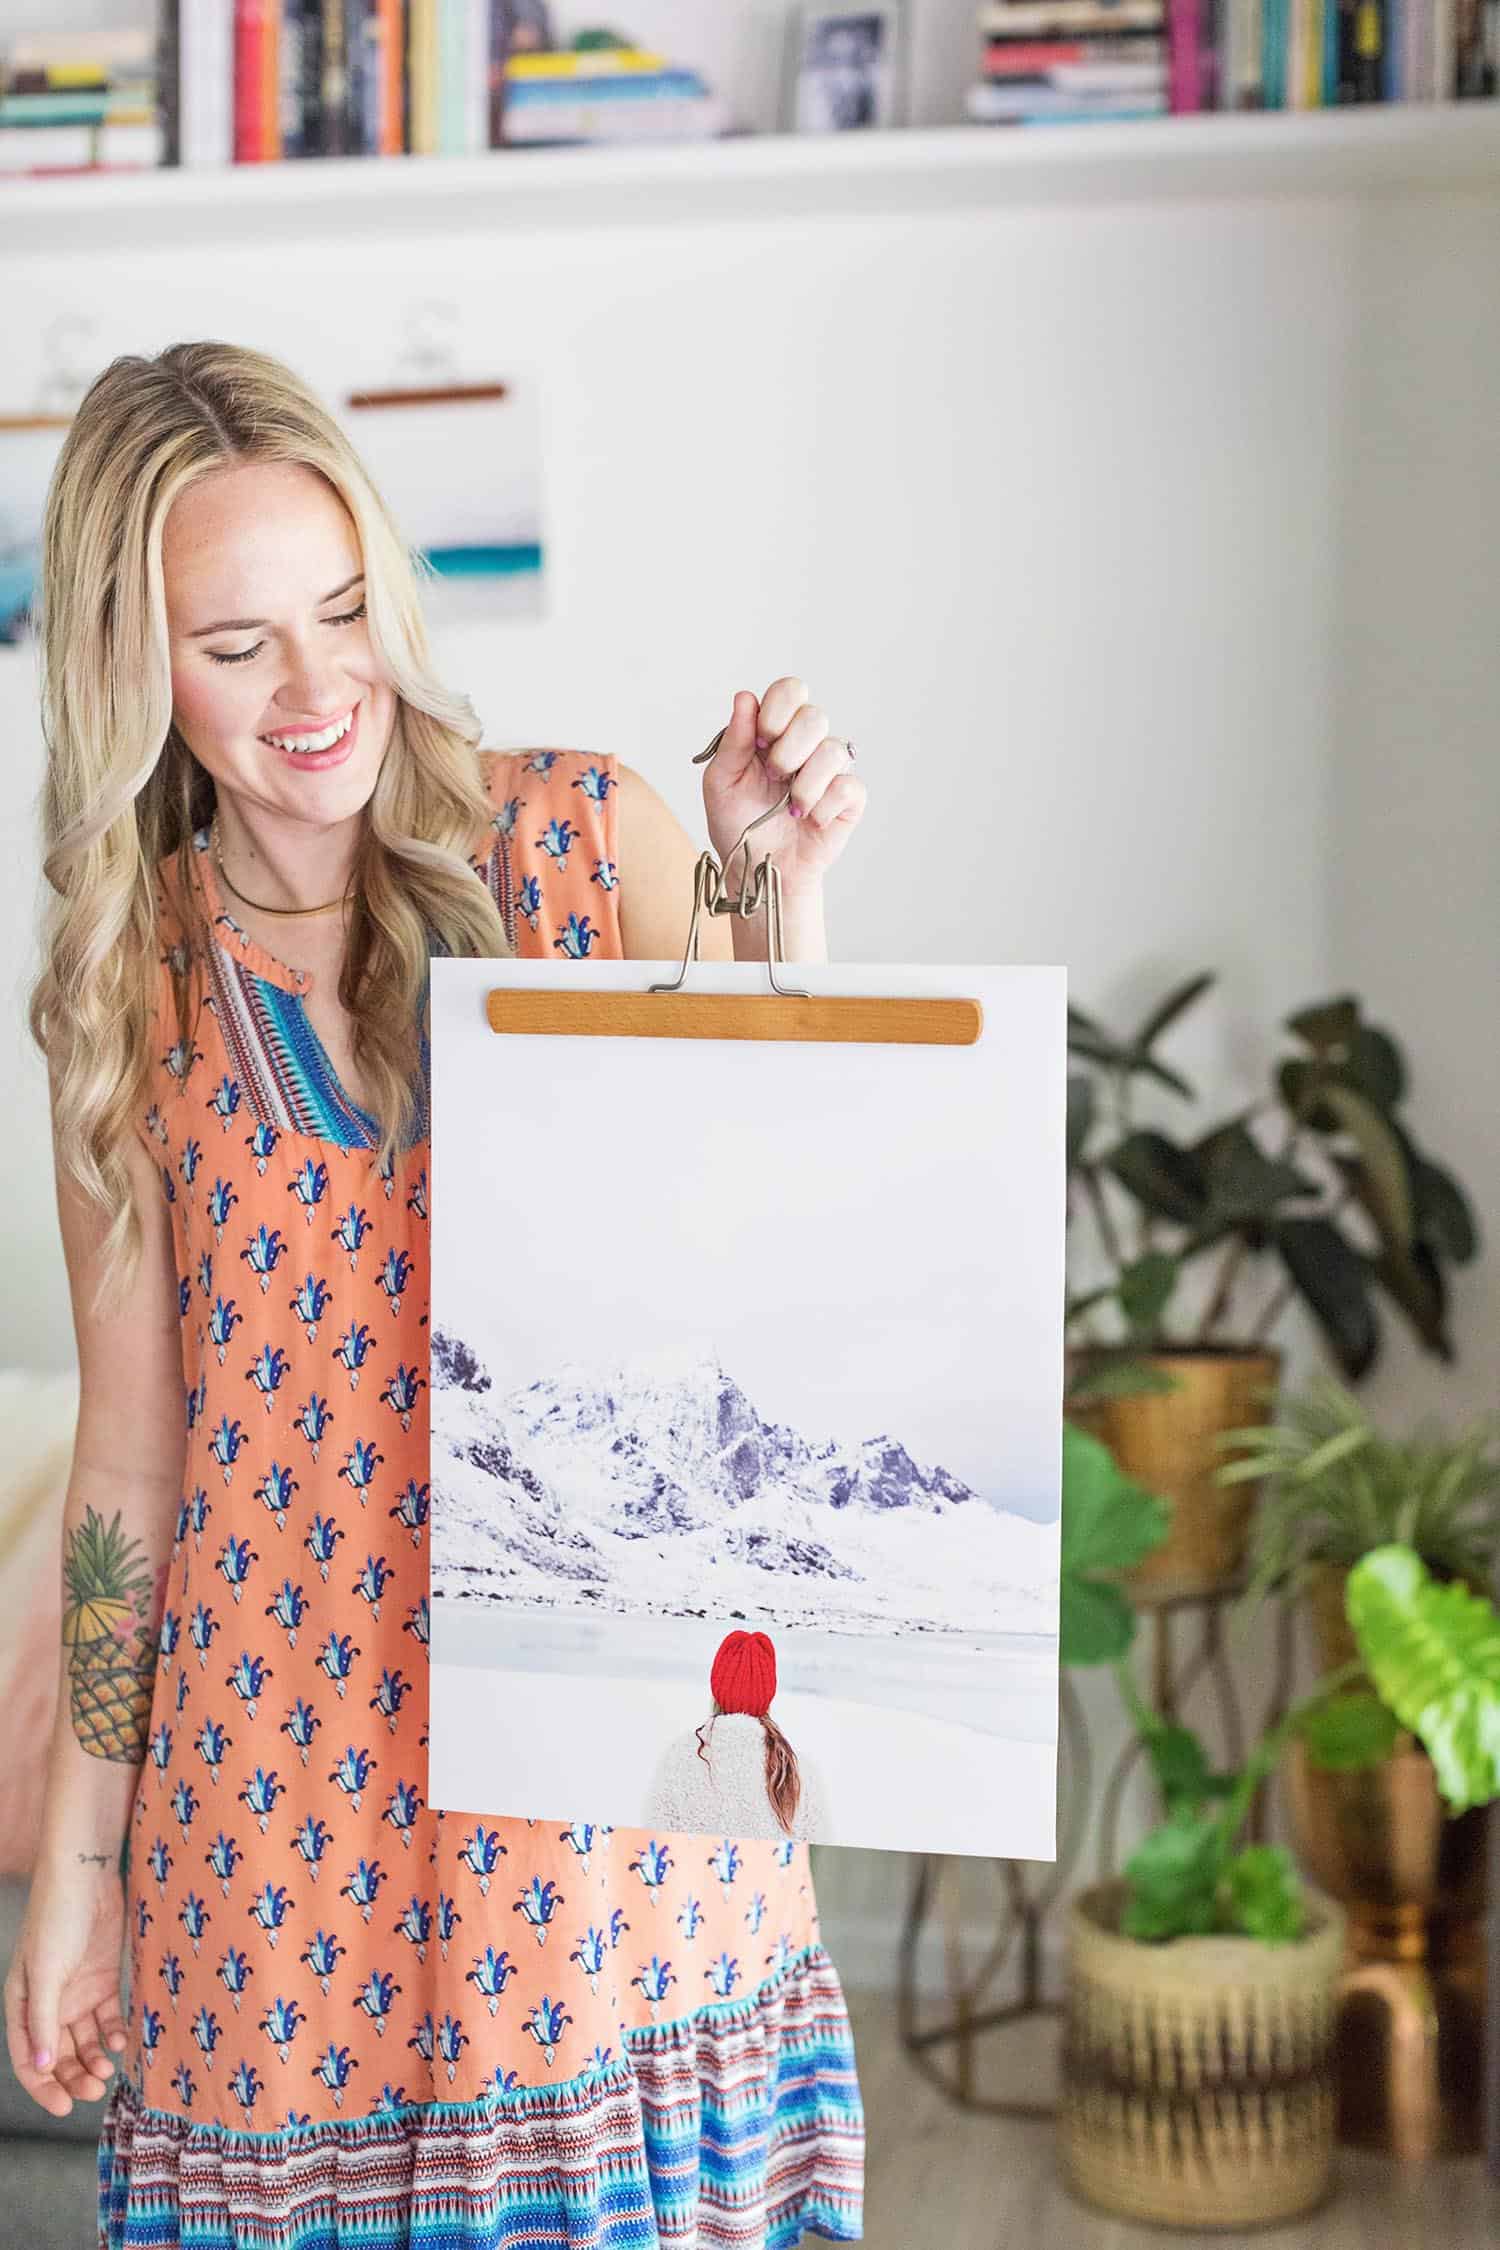
I wanted to share a little more about the mini gallery wall in our living room. I decided to do something a little different with the frames—I used wooden clothes hangers instead of a more traditional frame. I love the look! I actually saw an online store selling these types of “frames” (it was really just a clothes hanger being sold as a frame) for around $20. And although that’s totally affordable, it was obvious these would be super easy to make yourself, so I did—and all five of mine ended up being around the same price as the ONE I had seen online.
I created this mini gallery wall in collaboration with Canon USA. I recently got a PIXMA iP8720 which was how I was able to print these big, beautiful photos at home. Elsie has had an iP8720 for a while (you can see some projects she’s shared using hers here and here) and I’ve always loved not only the large-sized prints it can create, but also the super high quality. It’s perfect for printing photos or art prints that you’re really proud of, like I did with some of our recent vacation photos from our trip to Norway. ?
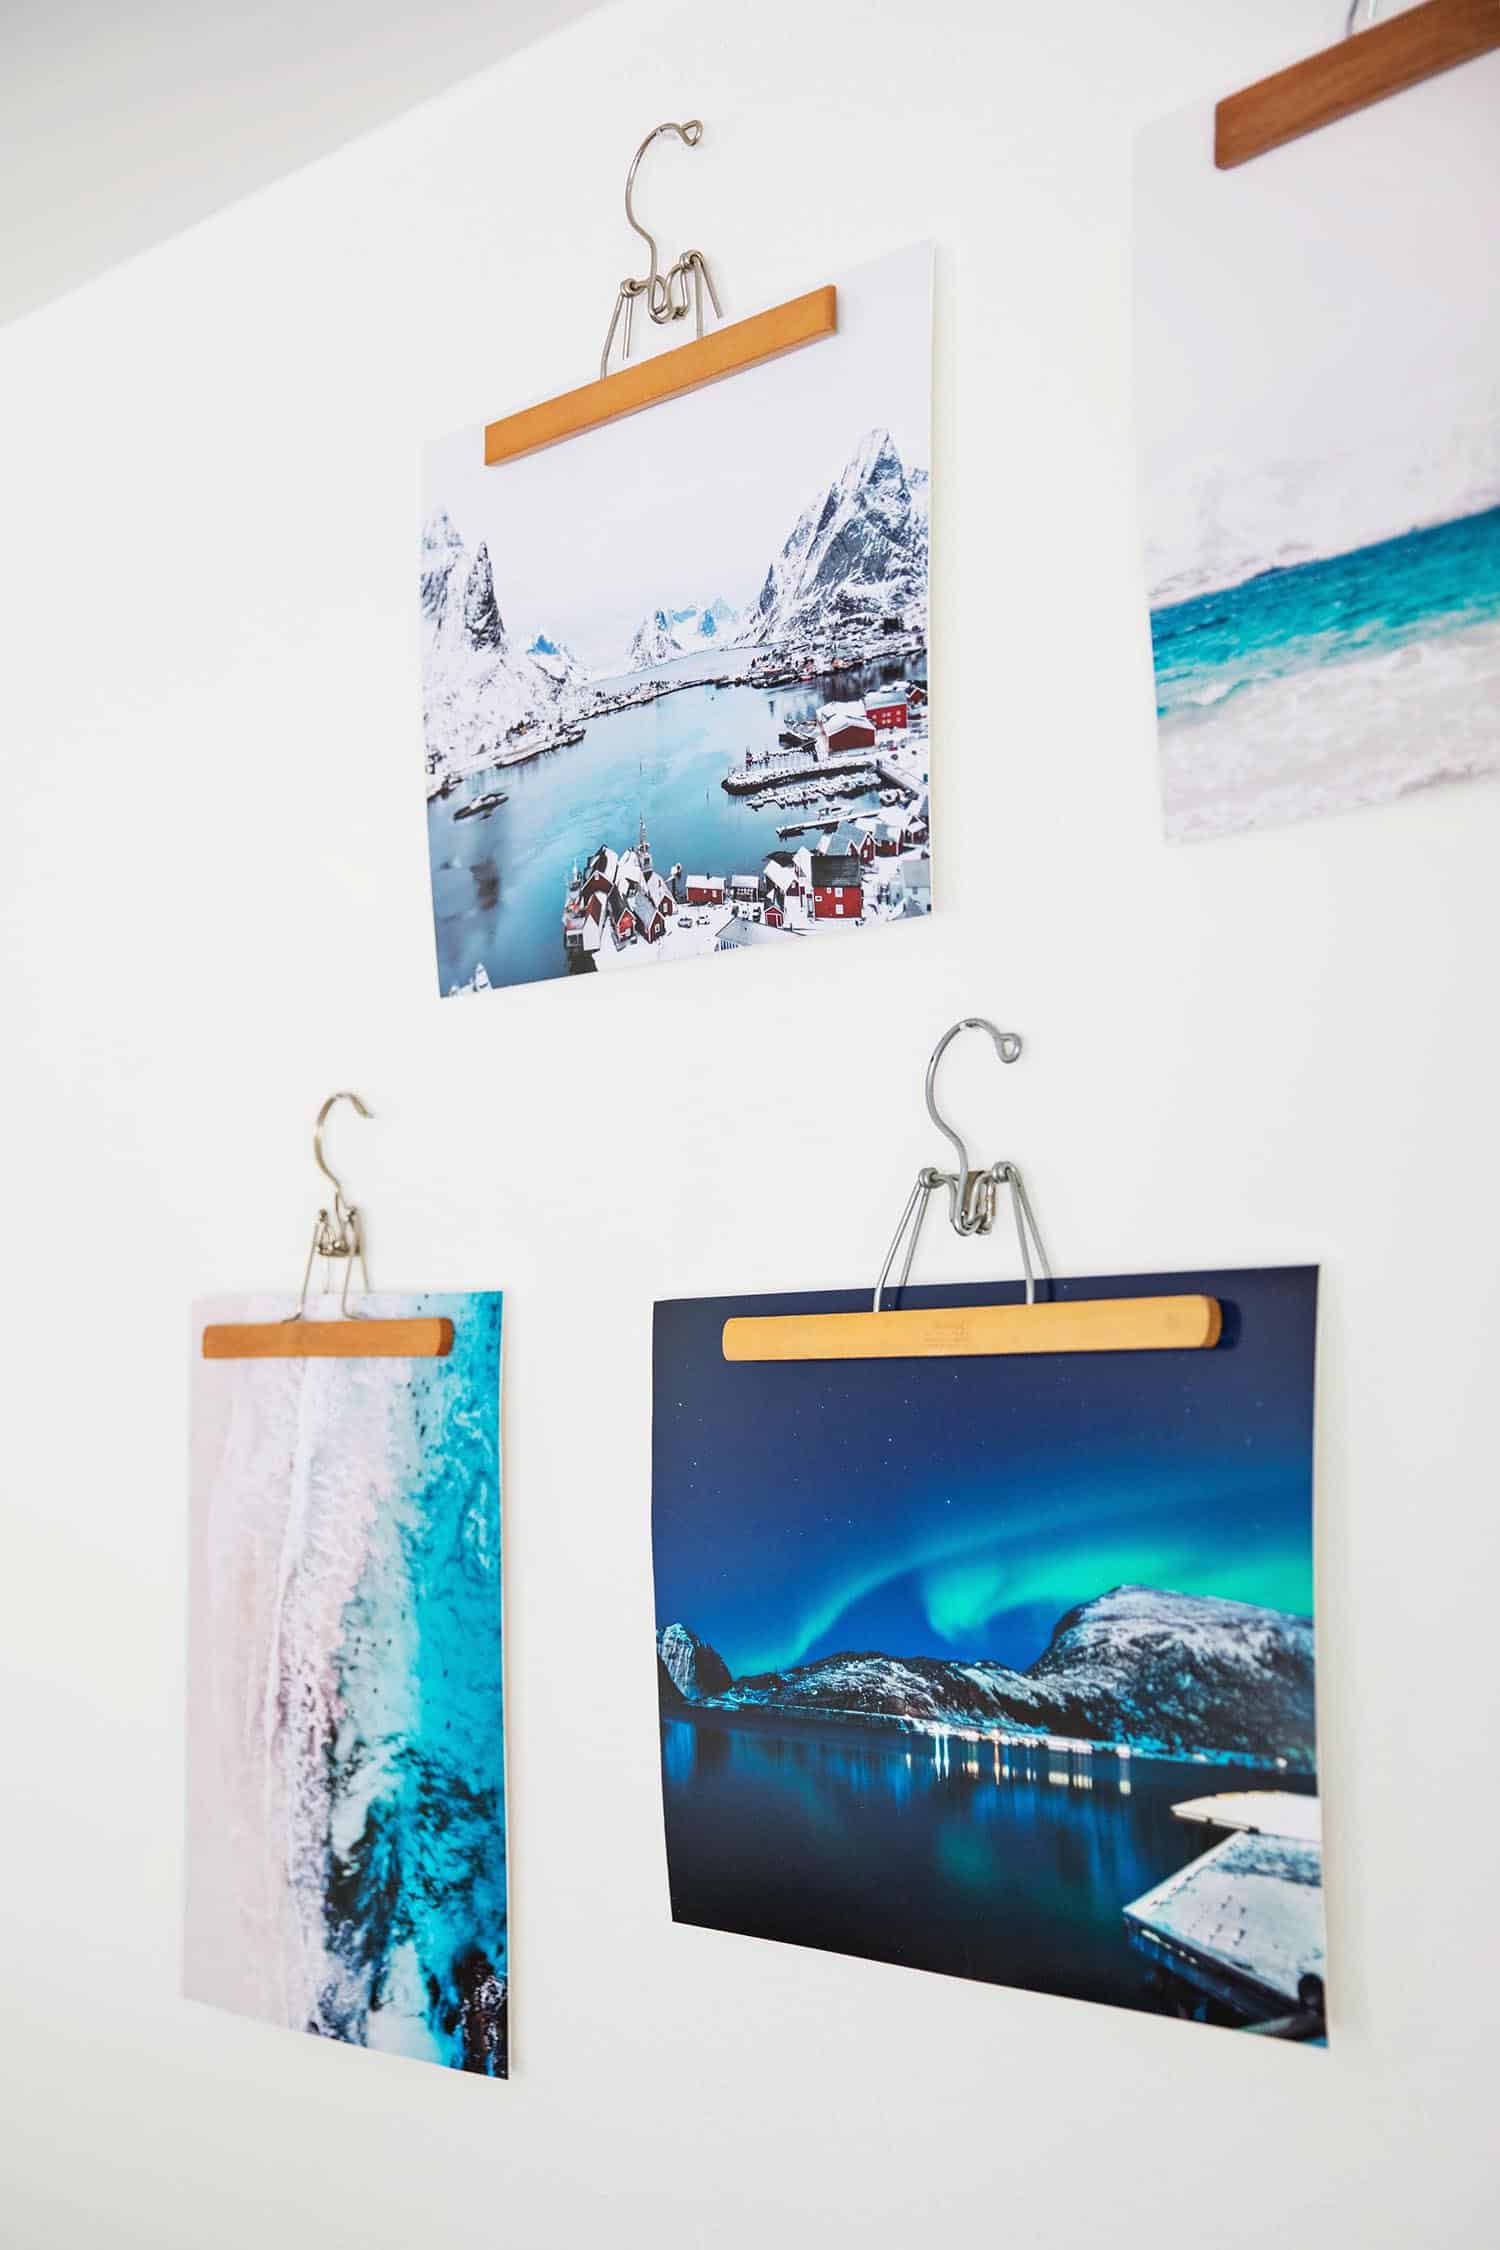
These are very straightforward to make yourself, you absolutely do NOT need any craft skills whatsoever! However, I did find that simply adding a photo to a wooden clothes hanger didn’t work quite as well as I thought. I realized pretty quickly that in order to make sure the photo stayed in place, and didn’t get damaged by any groves in the interior of the hanger, the project needed a little more. So I experimented with a few different materials and I’m gonna share that with you in case you plan to hang a few photos too. ?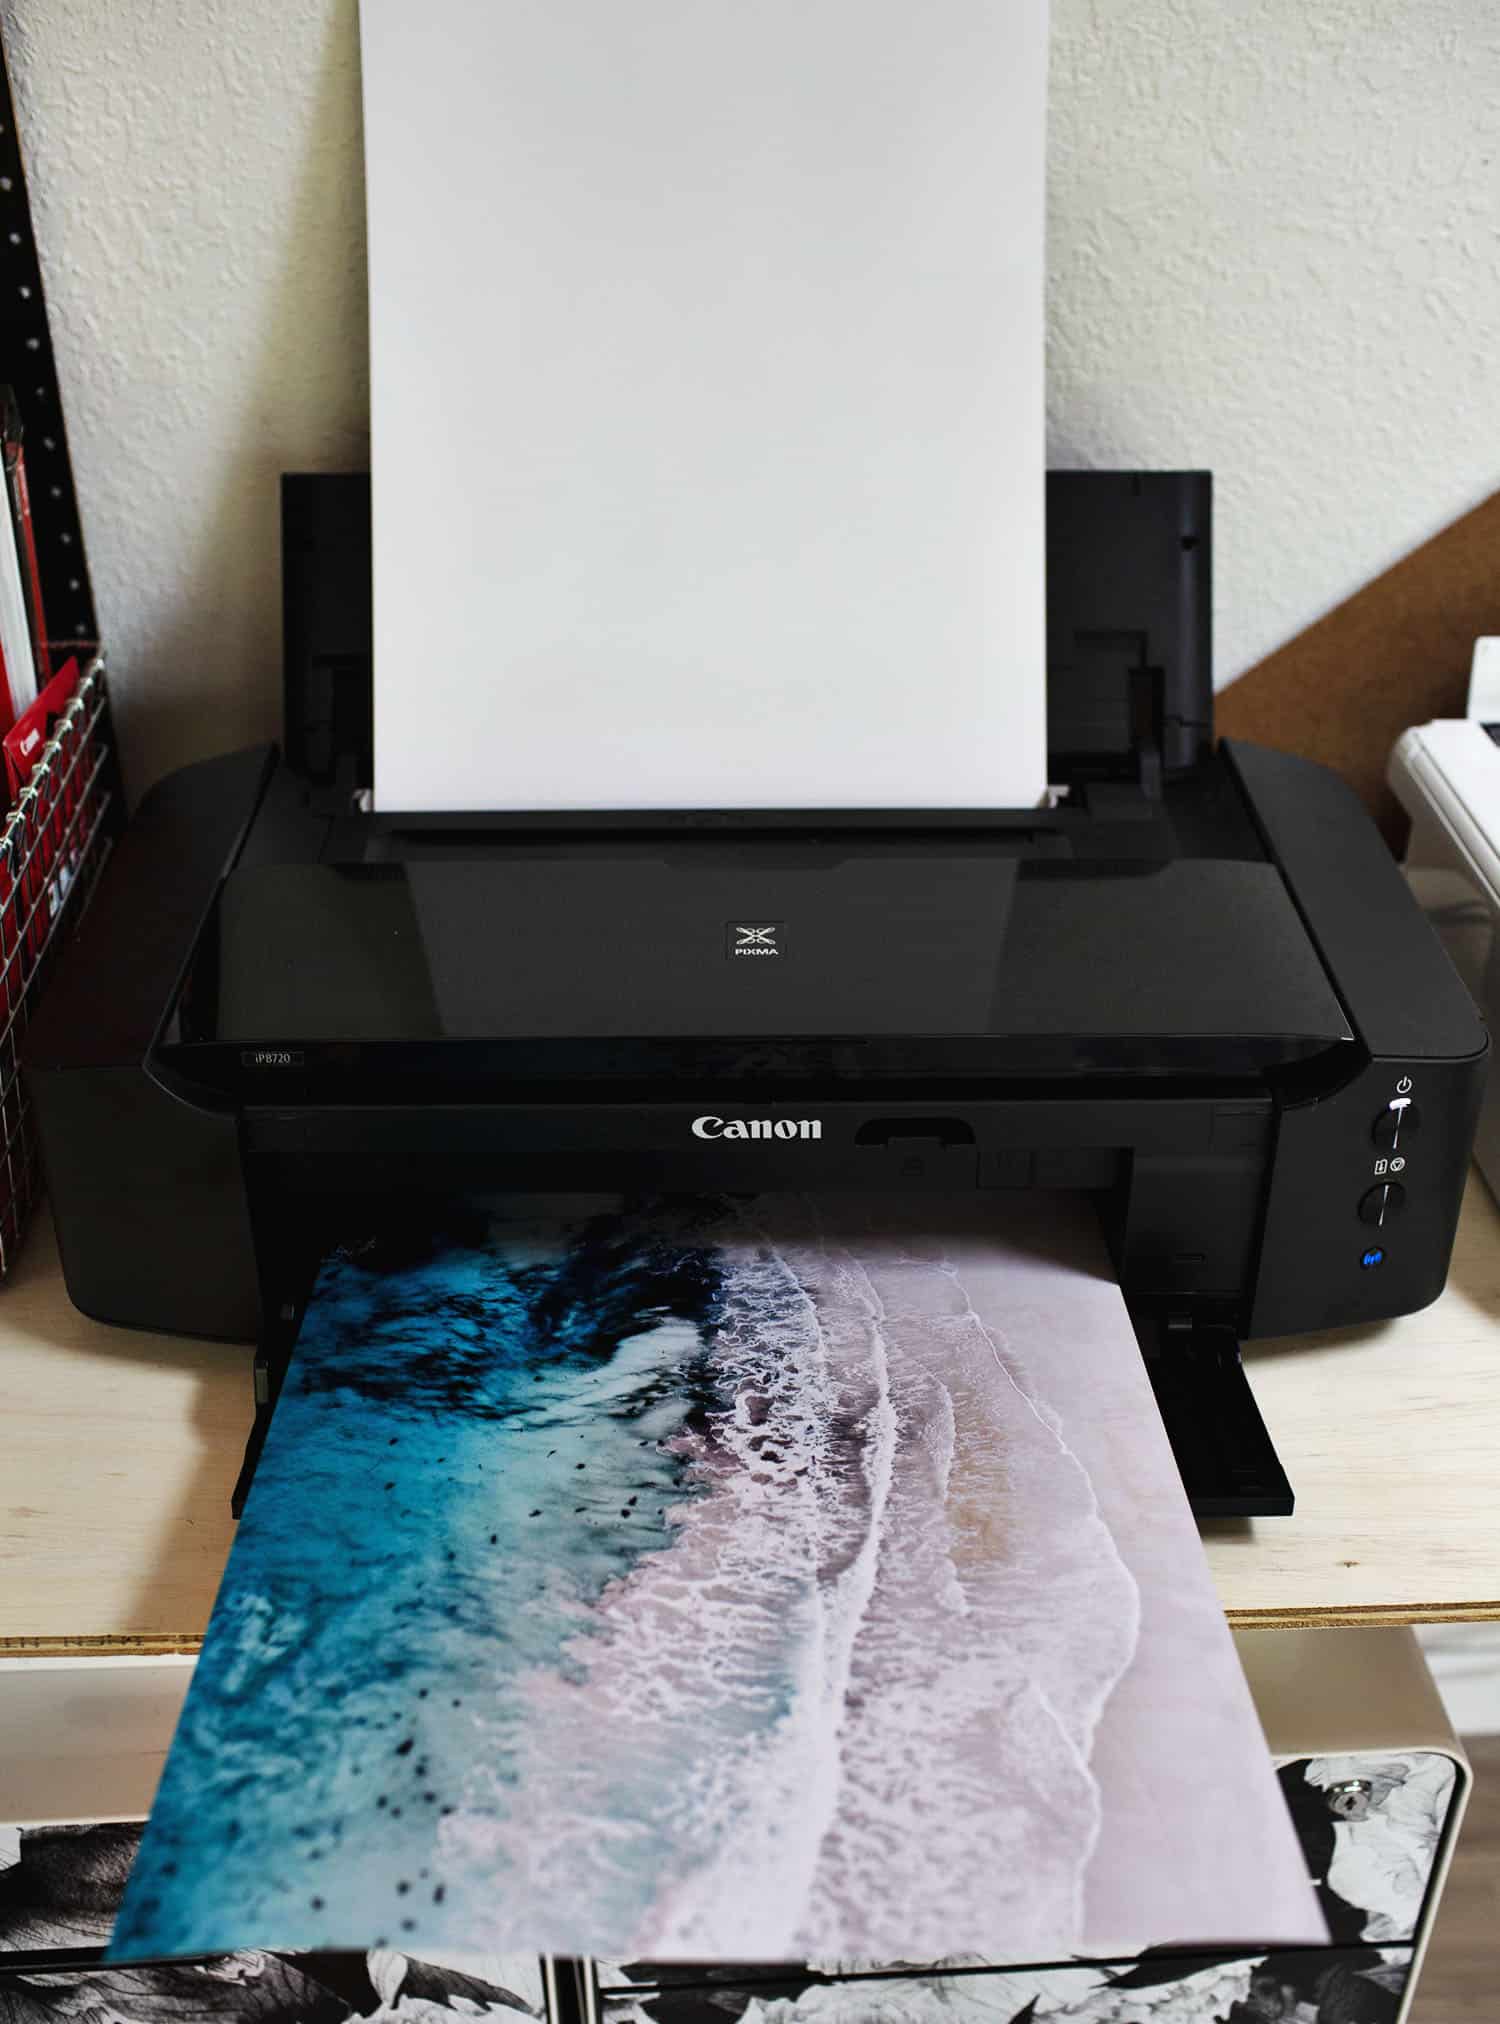
Here is the PIXMA iP8720. As you can see, it’s a larger printer than my PIXMA TS8120 (which you can see here), but look at these amazing colors! I just love the quality of this printer and that it can print large up to 13×19!
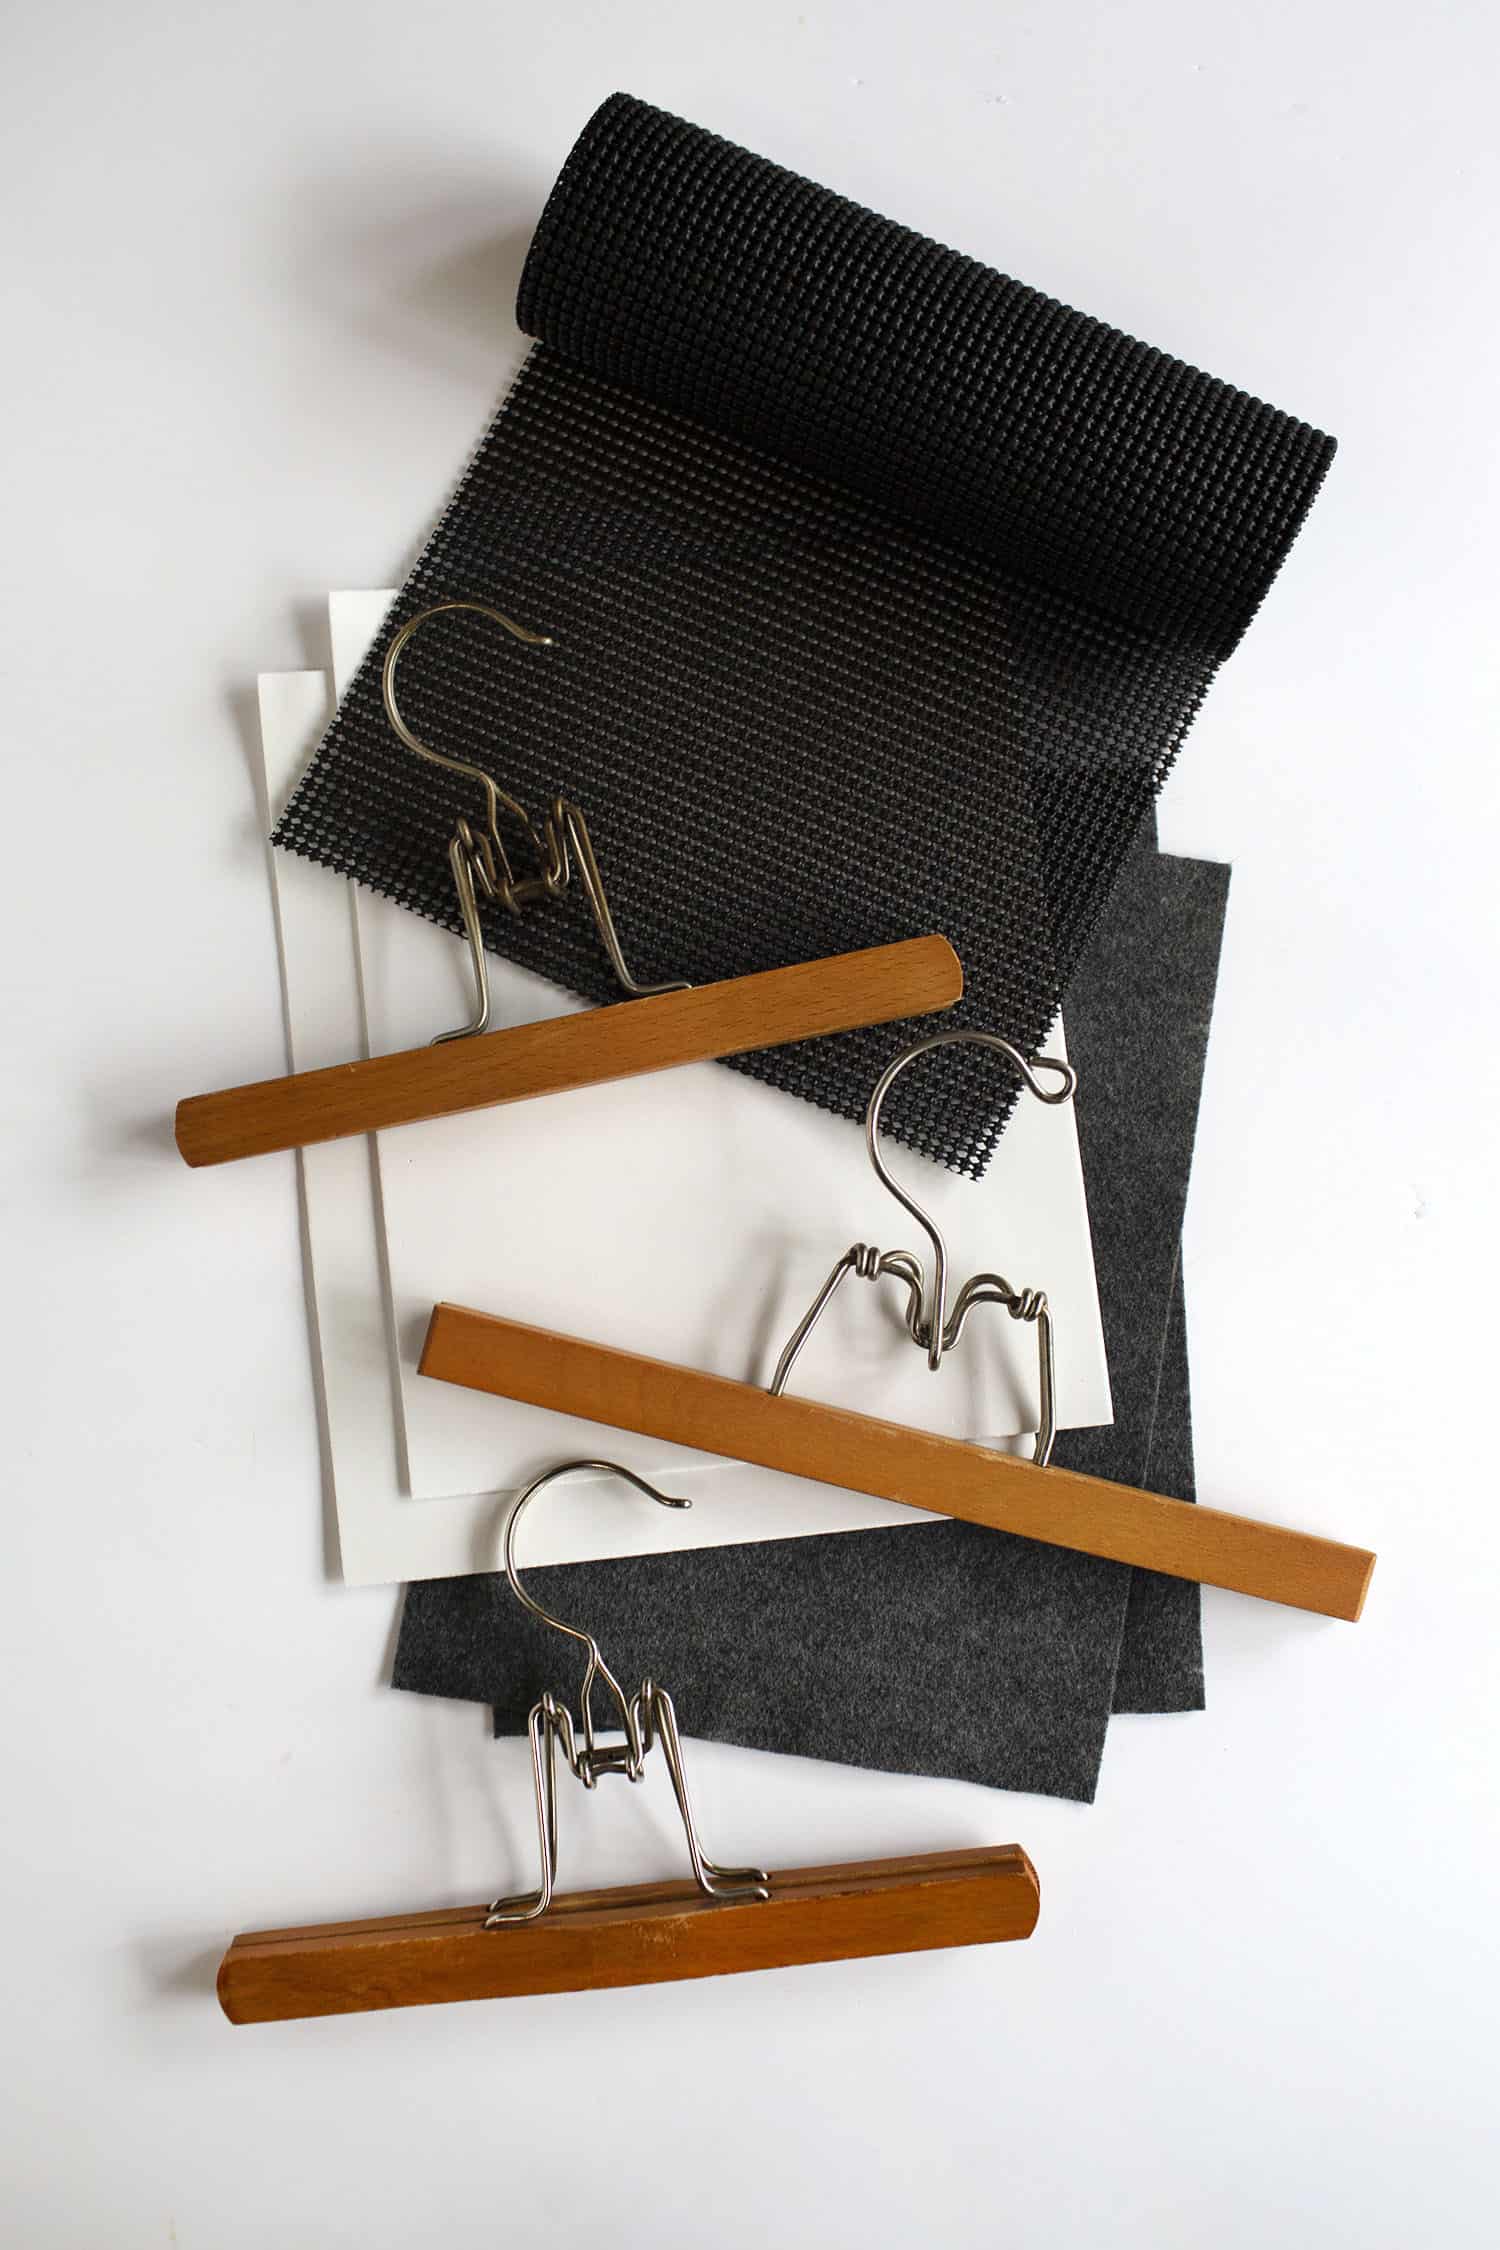
Like I said, I tested out three different materials on the inside of my wooden hangers before I figured out what worked best. I tried felt, shelf liner (similar to rug liners), and craft foam. Also, I totally recommend checking thrift stores or even Etsy for wooden hangers if you don’t already have some. A lot of times I see these at thrift stores, in big bags of random hangers, sometimes for prices as low as $1-$2 for the whole bag! So it doesn’t hurt to check there, but you can also buy them new if you like.
I was pretty certain that felt would be the best option. But I was wrong! Ha. I actually found that the felt didn’t hold onto the prints very well. If your hanger is already really tight (like it’s new or in like new condition), this still could be the best option as you may not have much issue with prints sliding out. But for older, more vintage wooden hangers (like mine), they may be a bit loose, so a bigger, heavy print will actually slip some in the hanger.
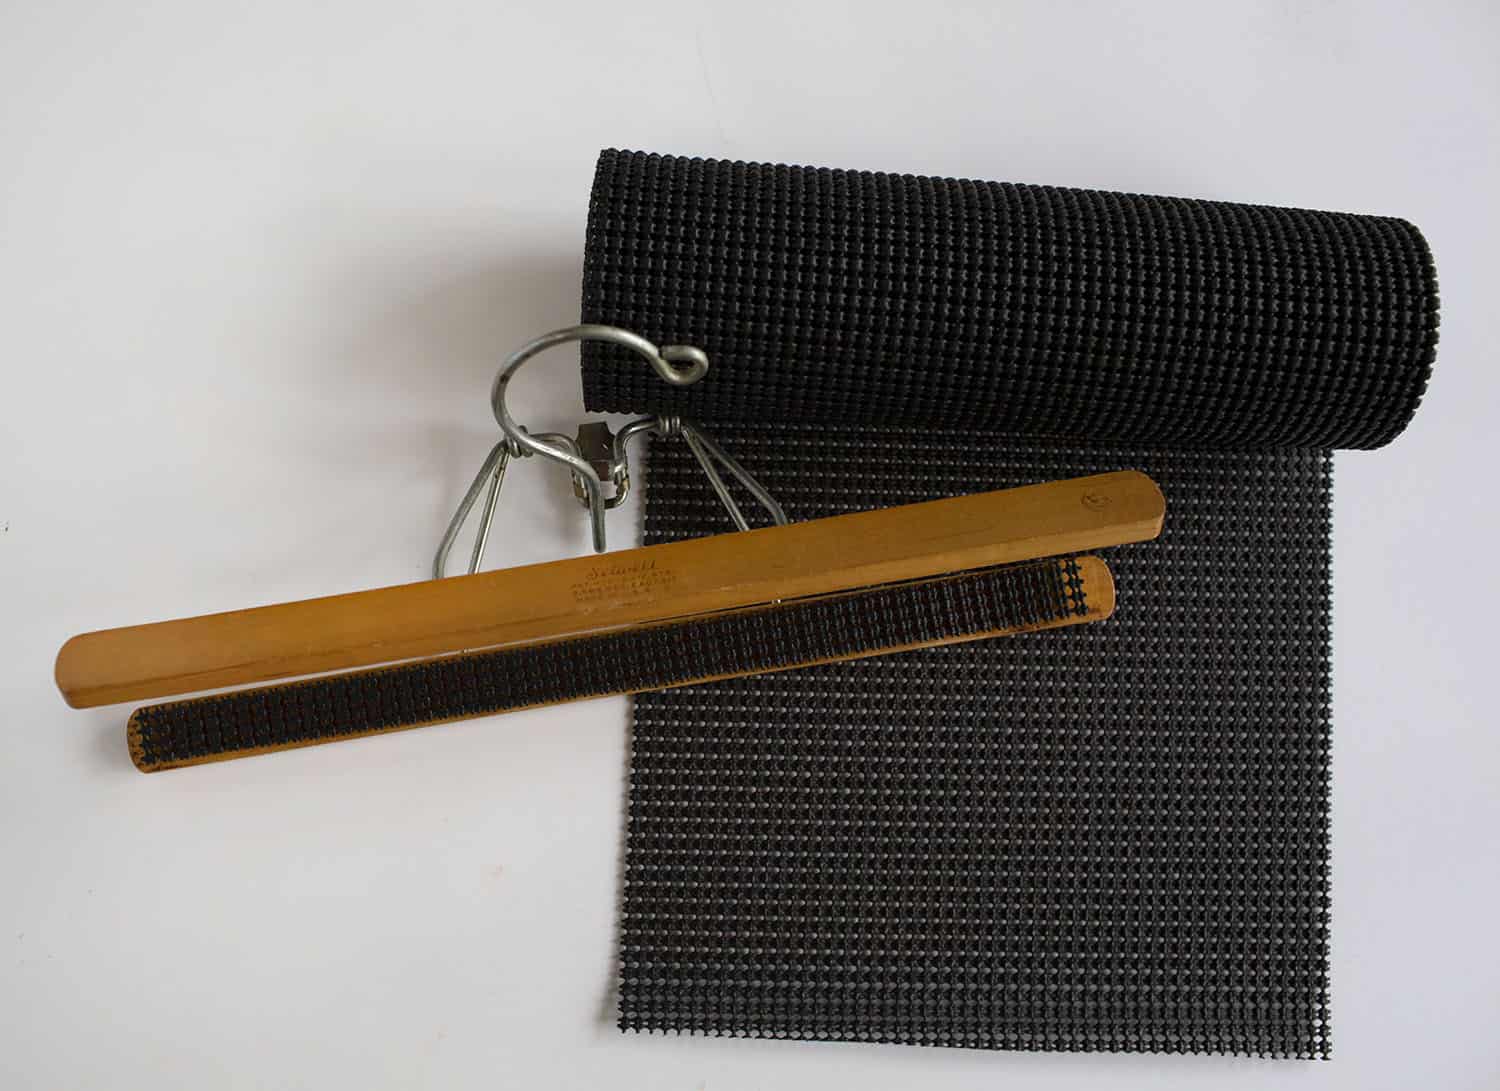
The next material I tried was shelf liner. I thought I was being really clever when I pick up a roll of this to try out, but it turned out not to be the best option (it was actually the worst of the things I tried). The texture of the liner left little indentations on the print. Which, not the end of the world, as you can always print another. But if you’re like me and you tend to move your photos around the house (sometimes to different frames over time), it’s not ideal to damage them in the frame. So I really don’t recommend this option.
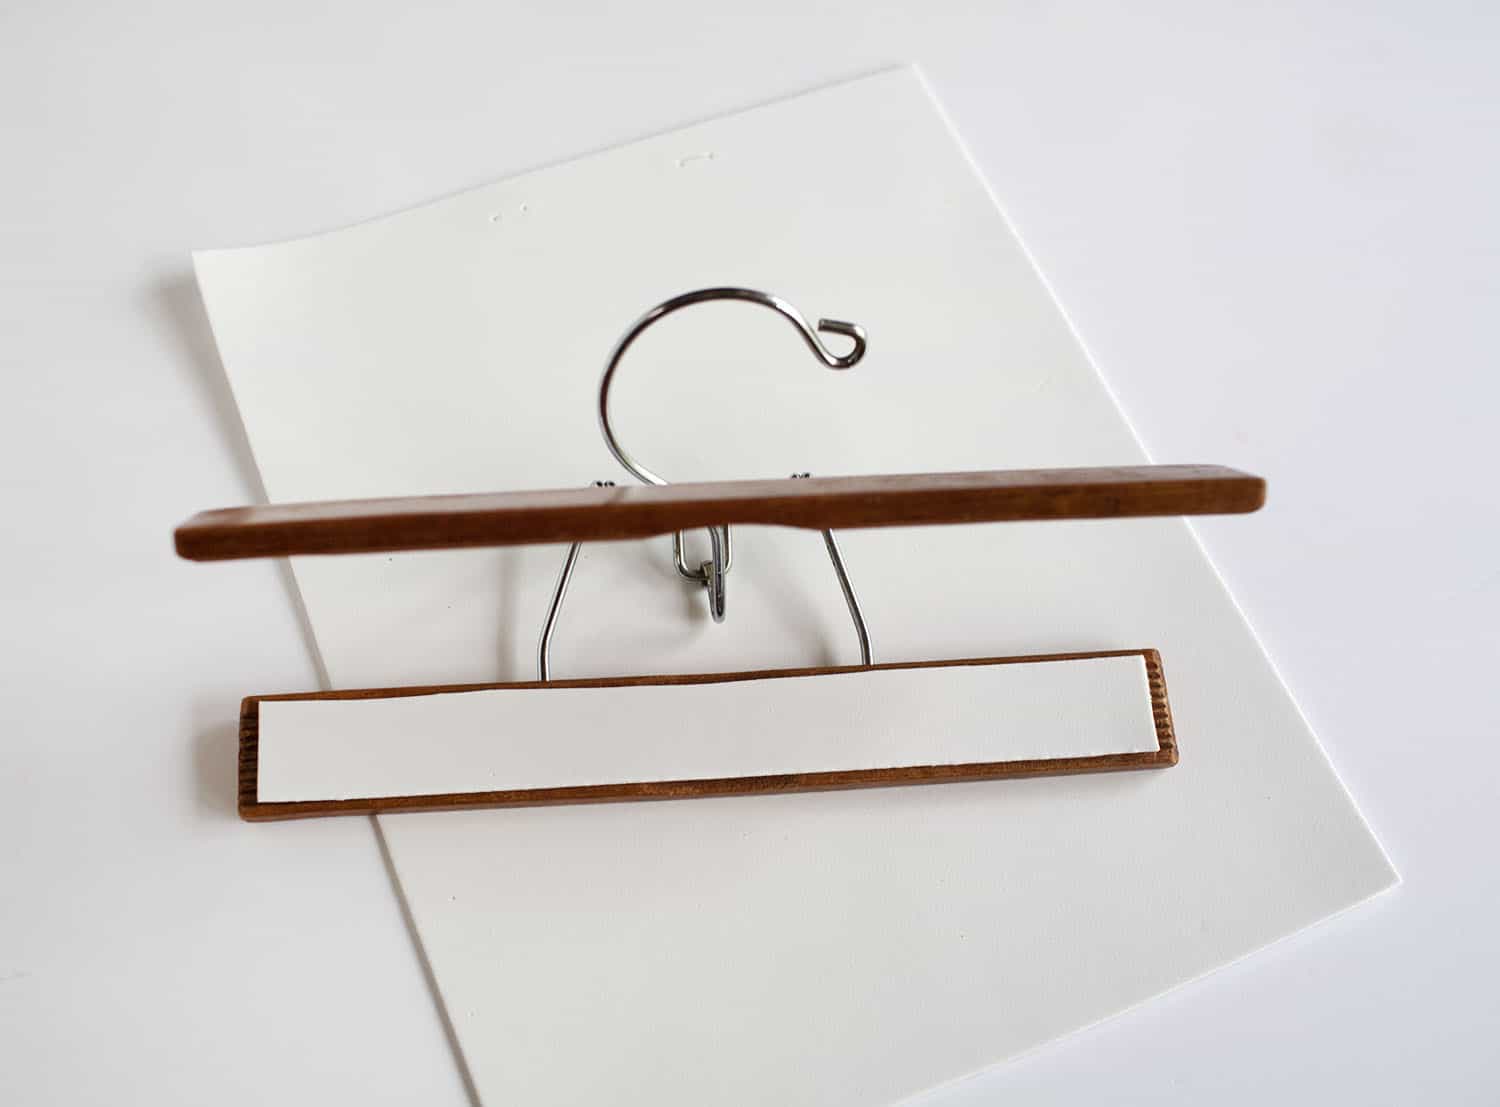
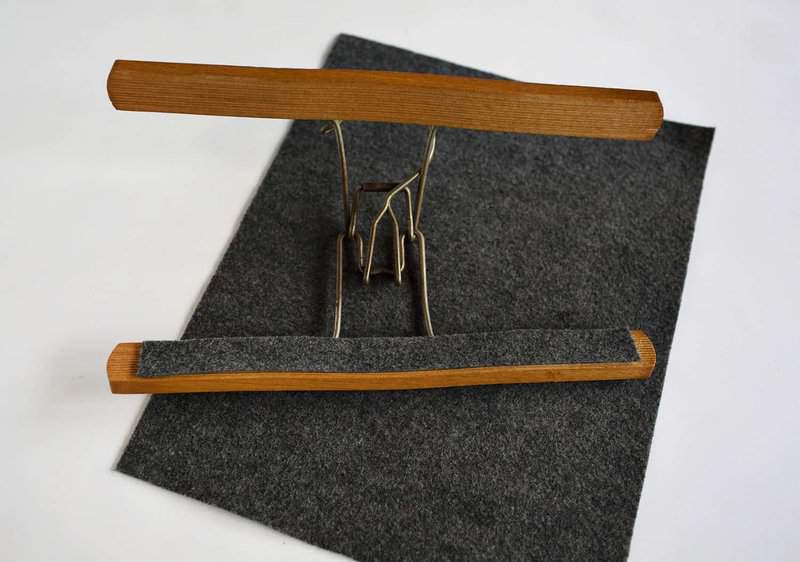
The last option I tried (which spoiler, was the best) was craft foam. You can buy sheets of this in the kids craft section of any big box craft store or even places like Walmart. This held the prints really secure but didn’t damage them. So this worked the best with the vintage wooden hangers I used.
Here’s a quick little video we made of how to put these frames together—it’s super simple!
I used crazy glue to secure the foam to the wood. And I used glue dots (which are acid-free) to adhere my prints to the poster board.
Which brings me to the second thing I noticed about this project. After a couple days, my prints seemed to want to curl up a little on the bottom edges, opposite of the wooden hanger. It may be because here in southern Missouri where I live we’re moving into our summer months and it gets pretty humid. So if humidity is not an issue for you, you may not have this problem. But, if you do, I recommend reinforcing your prints with poster board before hanging.
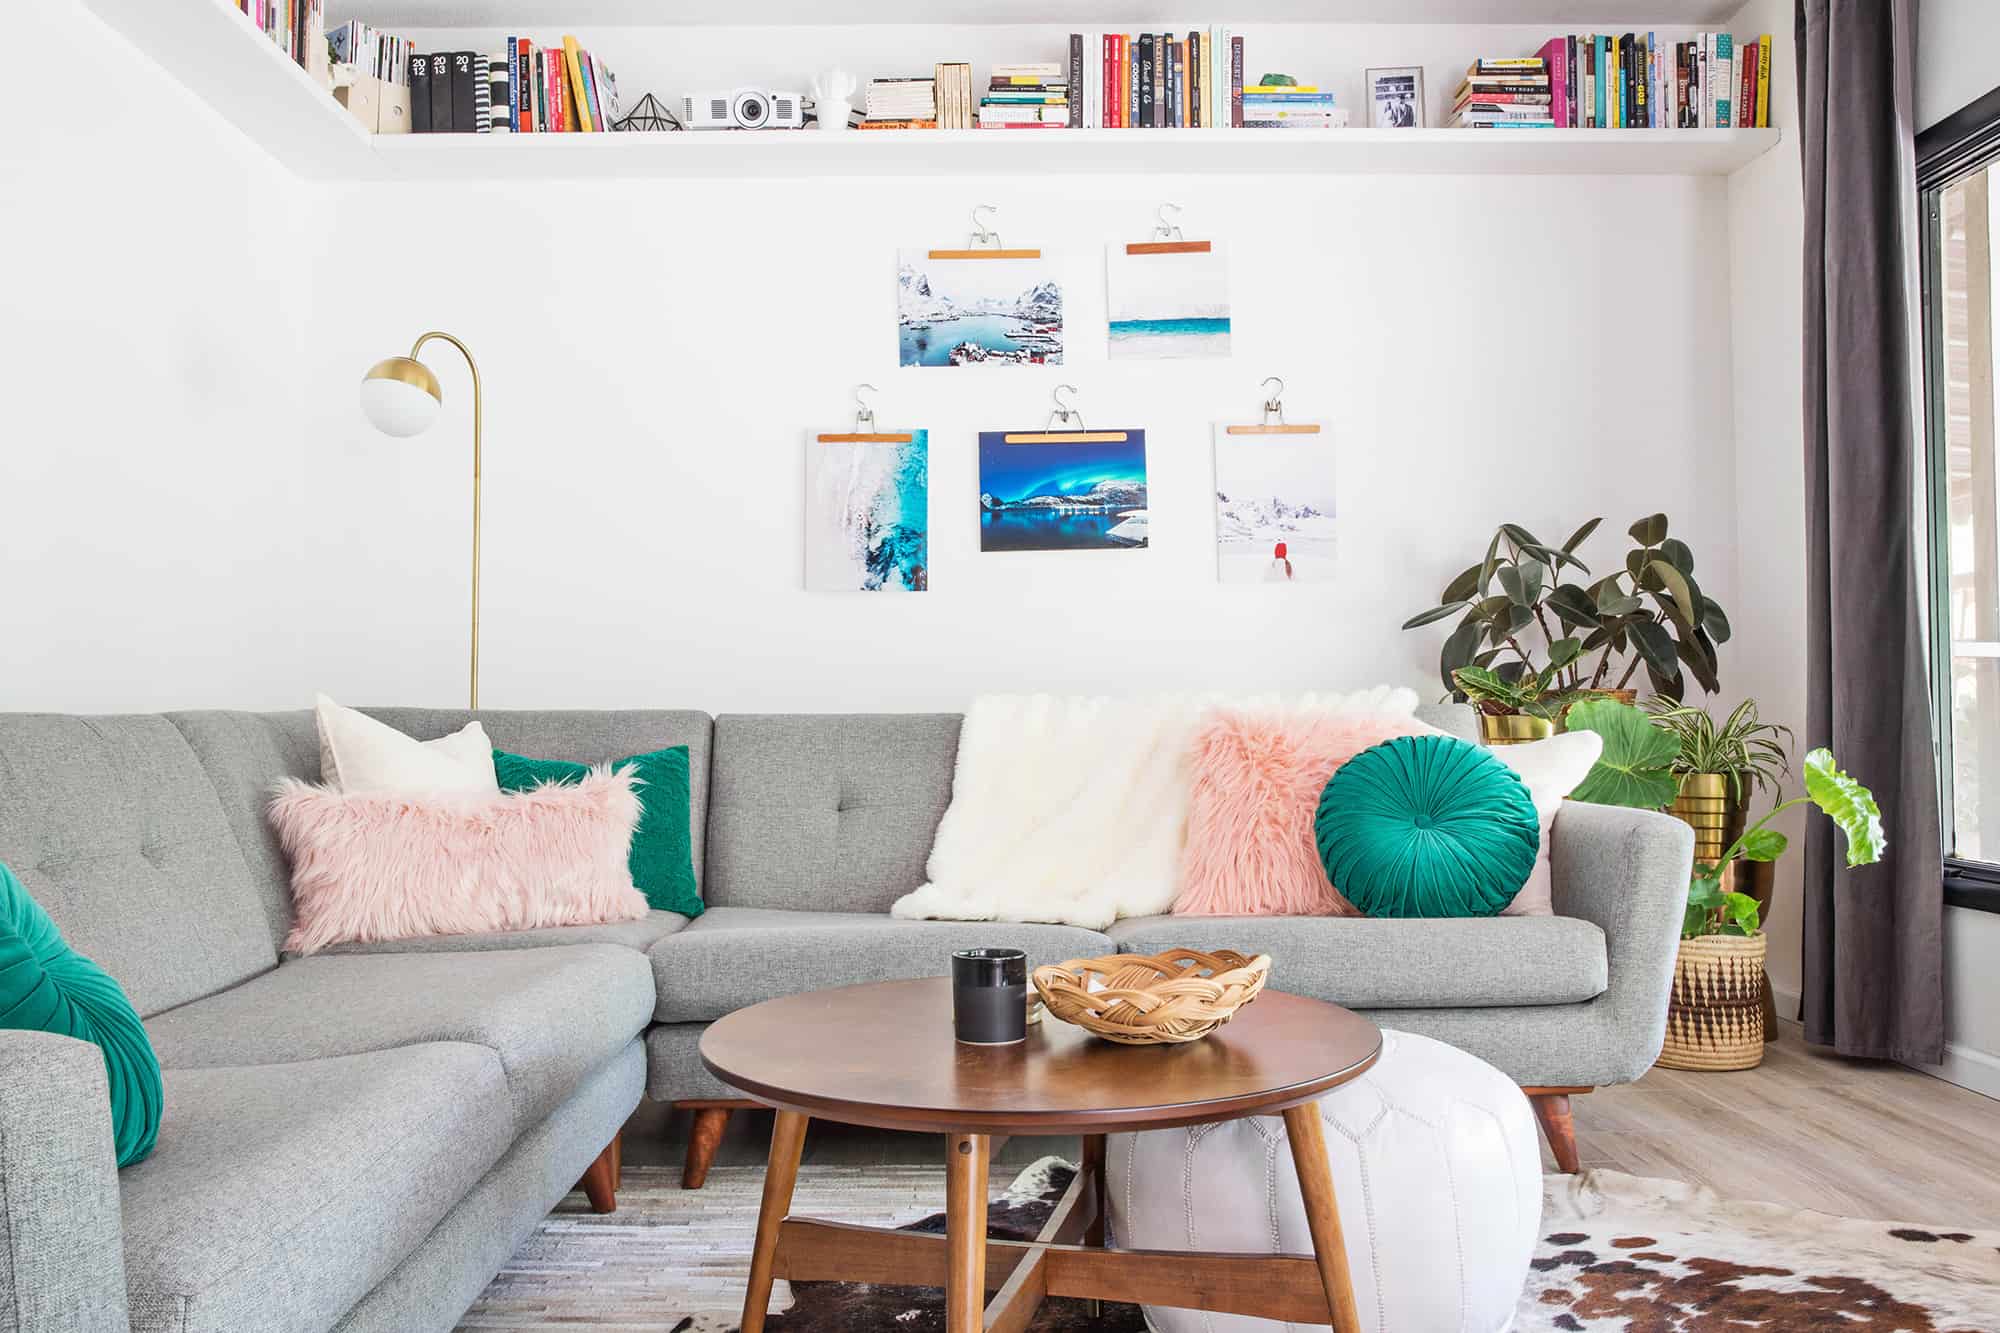
I really love the look of the prints with these hangers. And bonus points for being something I could put together in just an hour or so. But if you’re looking for something a little more advanced, no worries! You should try some of these projects: Floating Acrylic Frame DIY, Poster Hanger, or Wood Burned Photo Frames. Thanks for letting me share! xo. Emma
Credits // Author: Emma Chapman. Photography: Janae Hardy and Emma Chapman. Video: Jared Statler. Music: Jeremy Larson. Photos edited with A Color Story Desktop.