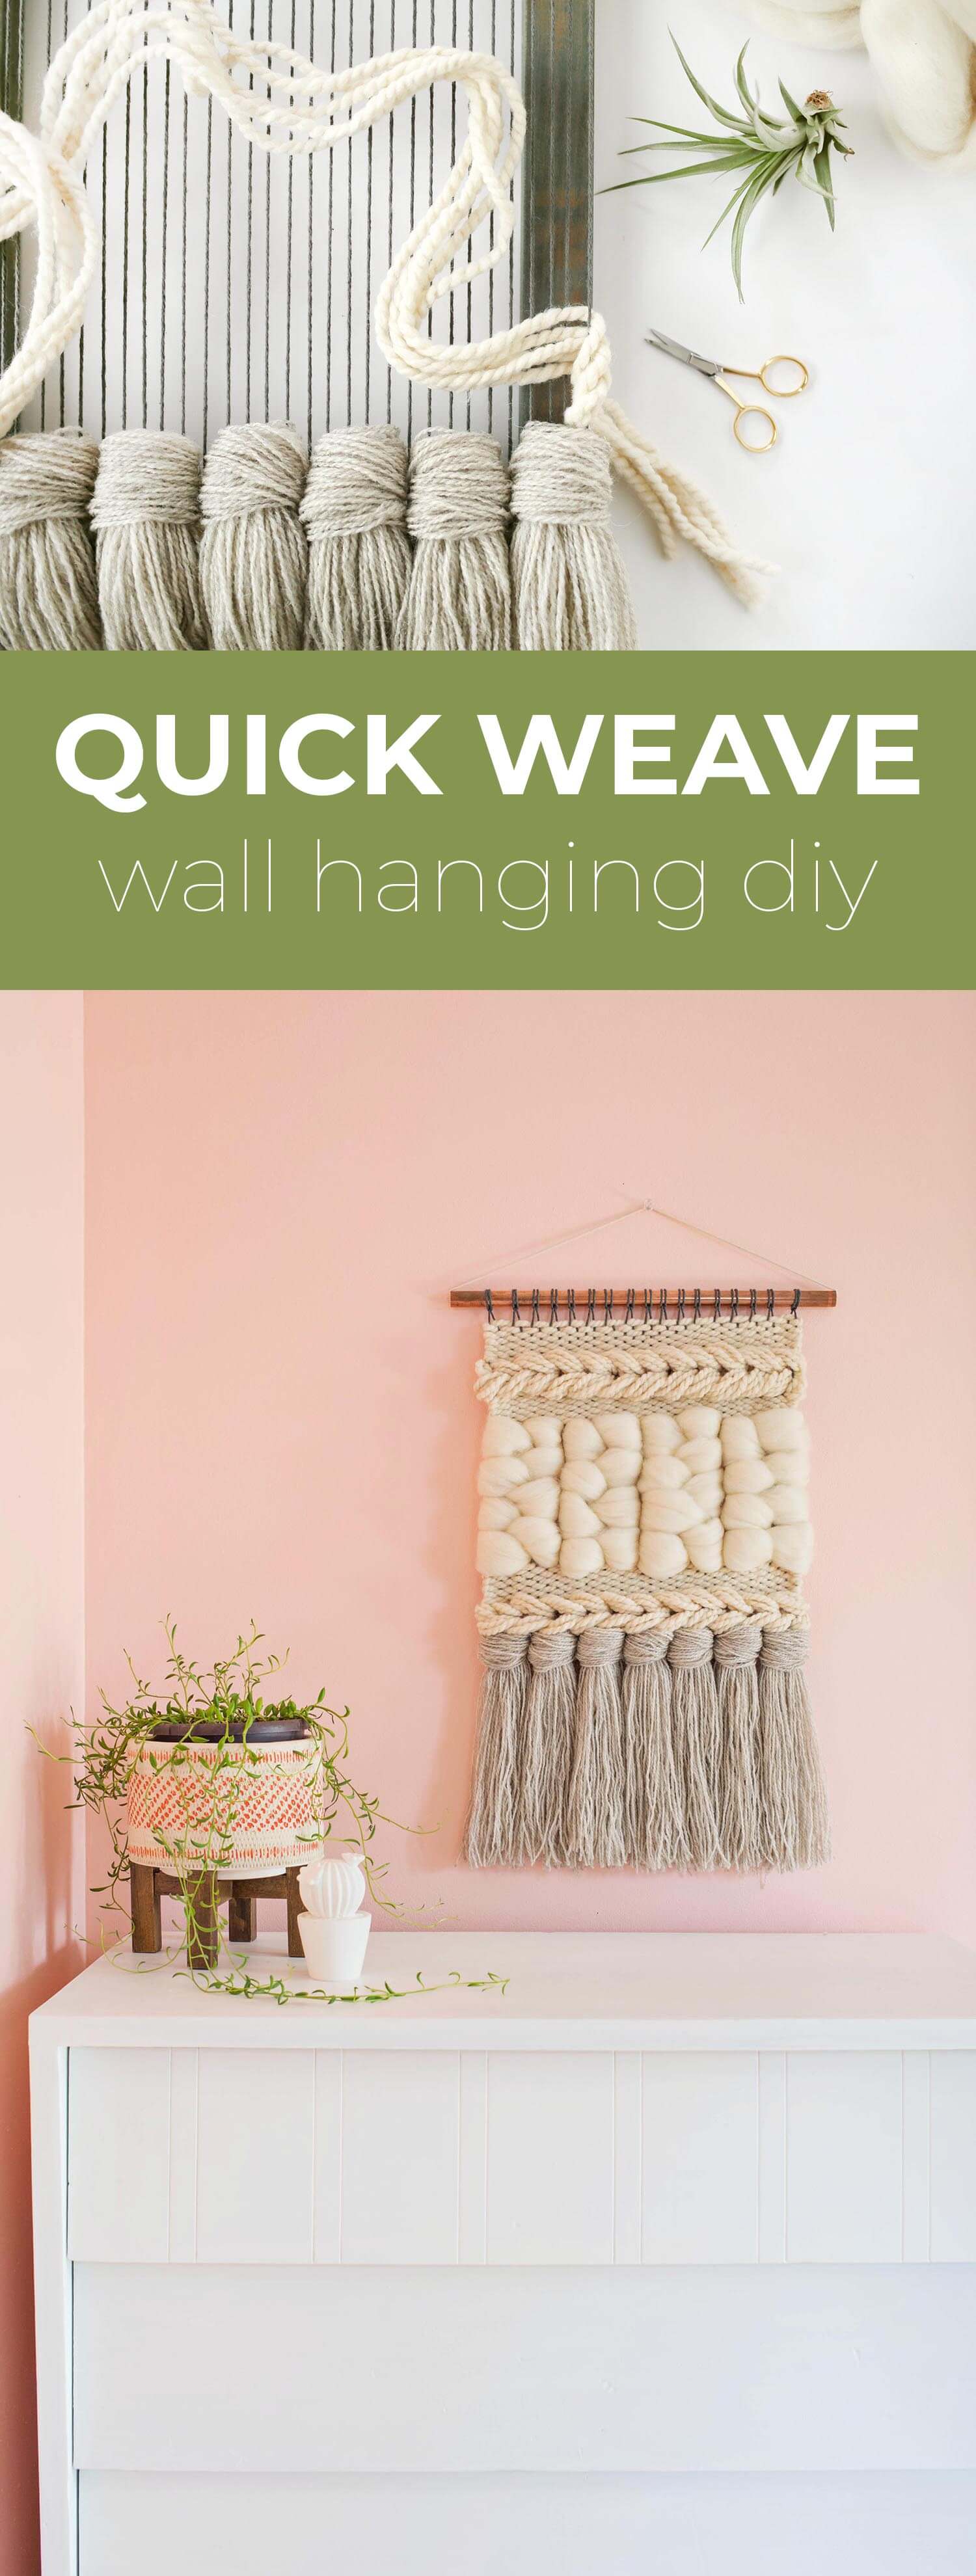
 The title of this tutorial may be a little misleading because weaving is never really a quick activity. However, if you’ve been dying to make your own textural weave and don’t want to spend five hours sitting down to make one, this tutorial is for you. Using chunky yarns and these specific stitches, you can fill your loom in less than half the time it usually takes to make a medium wall hanging. This design can easily be customized to fit with your home’s colors or would make a fabulous housewarming gift for a friend. Follow along to see how to make your own!

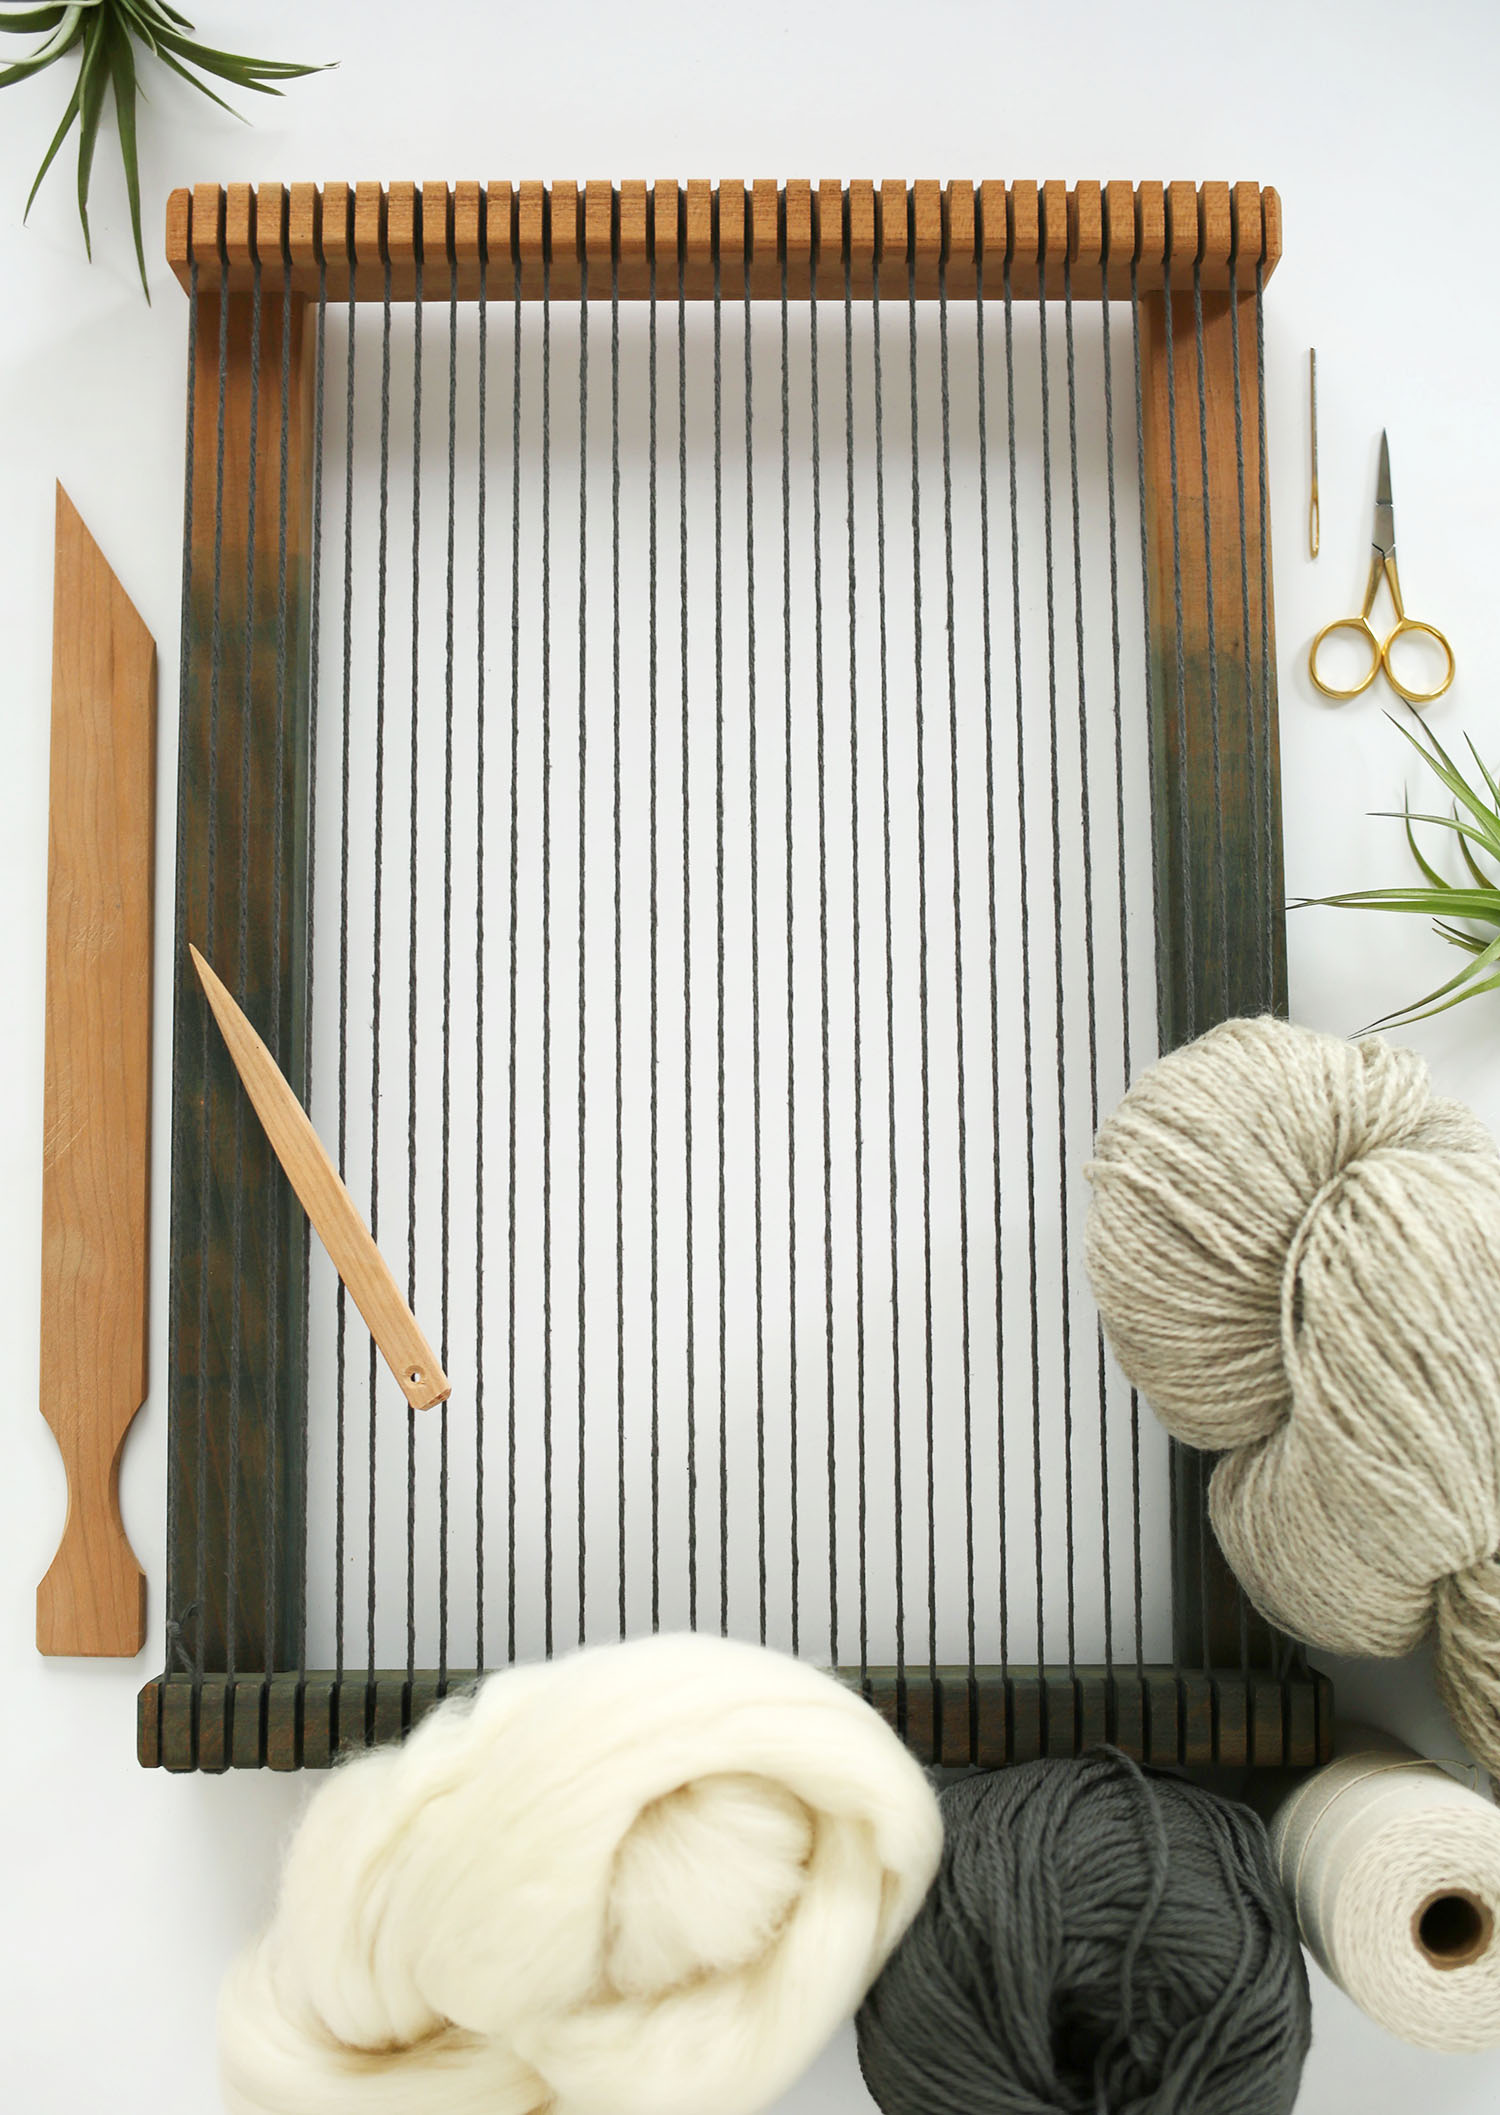 Supplies
-lap loom (mine is 13″ x 18″)
-weaving sword or ruler
-one skein of super chunky cream yarn (90+ yards)
-one skein of neutral, worsted weight yarn for bottom fringe (140+ yards)
–8 oz. of merino wool roving
–cotton yarn for warp
-scissors
-3″ tapestry needle
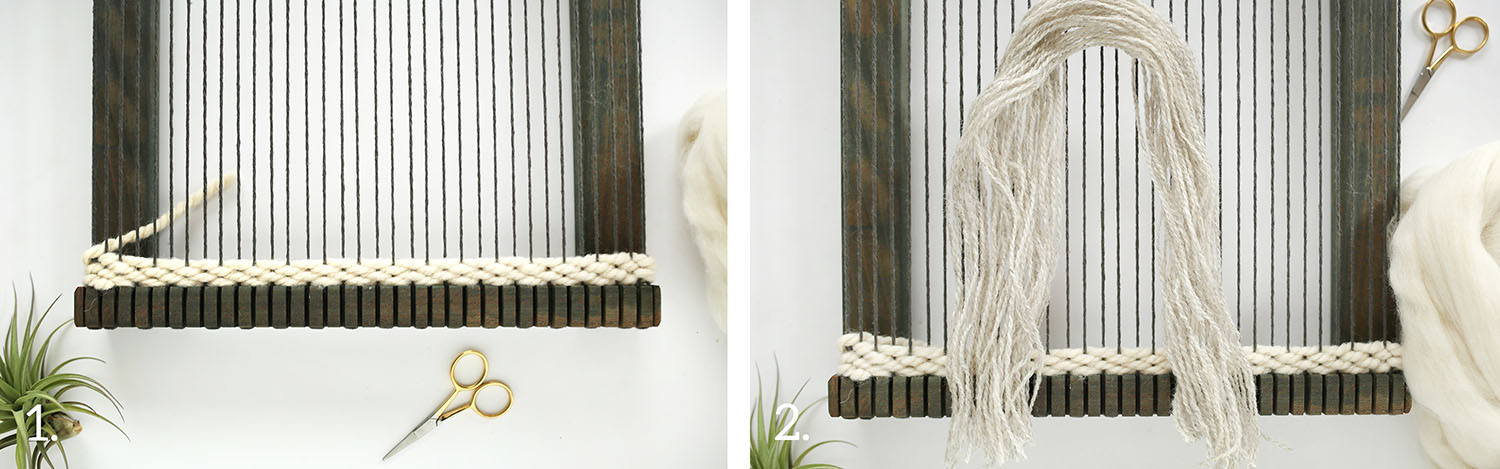 Step One: Warp your loom so that you are using the full width. Start your knot on the bottom of your loom and end with the other knot on the bottom of your loom as well for an even amount of warp rows. Brand new to warping a loom? No worries! Review this beginner’s tutorial for those steps in more detail. Once you’ve warped your loom, add in four rows of plain weave. This creates a foundation before we add rya knots. Not sure how to plain weave? Again, check back in that beginner’s tutorial for detailed steps.
Step Two: We’re going to be making extra thick rya knots, so cut about 20 strands of your neutral, worsted weight yarn to measure about 20″ long. These don’t have to all be even because we’ll be trimming them later. I made one rya knot bundle for every five warp rows. Except I had 34 warp rows instead of 35, so I just fudged on one. If you’re using a more narrow loom, you can adjust accordingly.
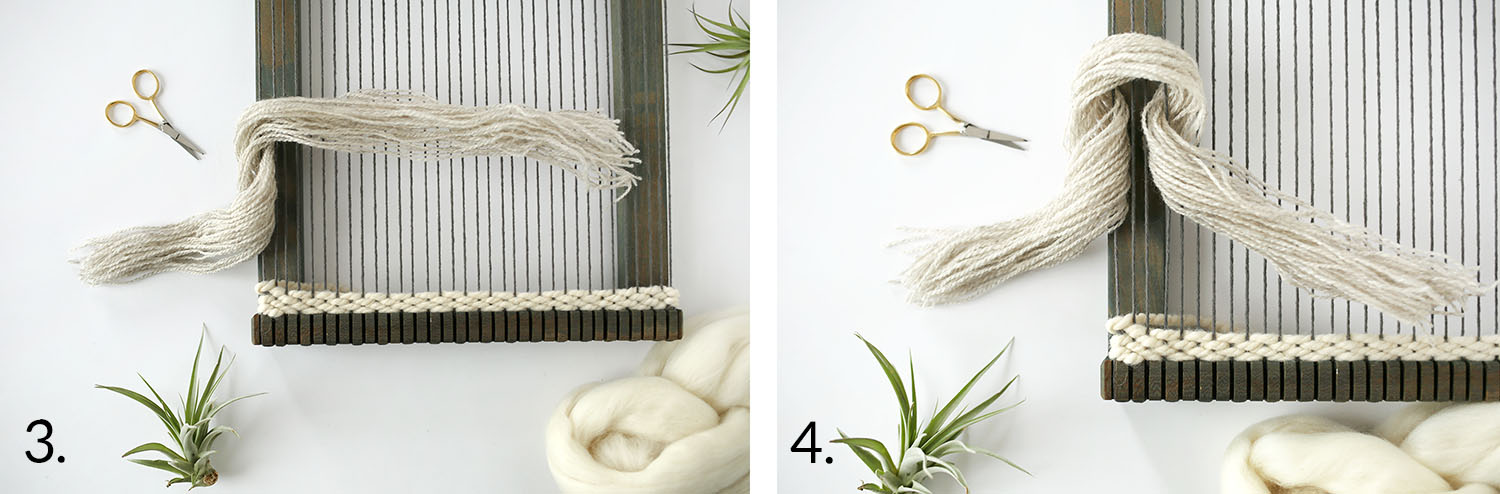 Step Three: Find the center of your first rya knot bundle and lay it on top of your warp rows. Wrap the end closest to the outer warp row all the way around as shown.
Step Four: Then skip the next two warp rows and wrap the other end of your bundle all the way around the fourth warp row. Imagine the two ends wrapping towards each other and then away. 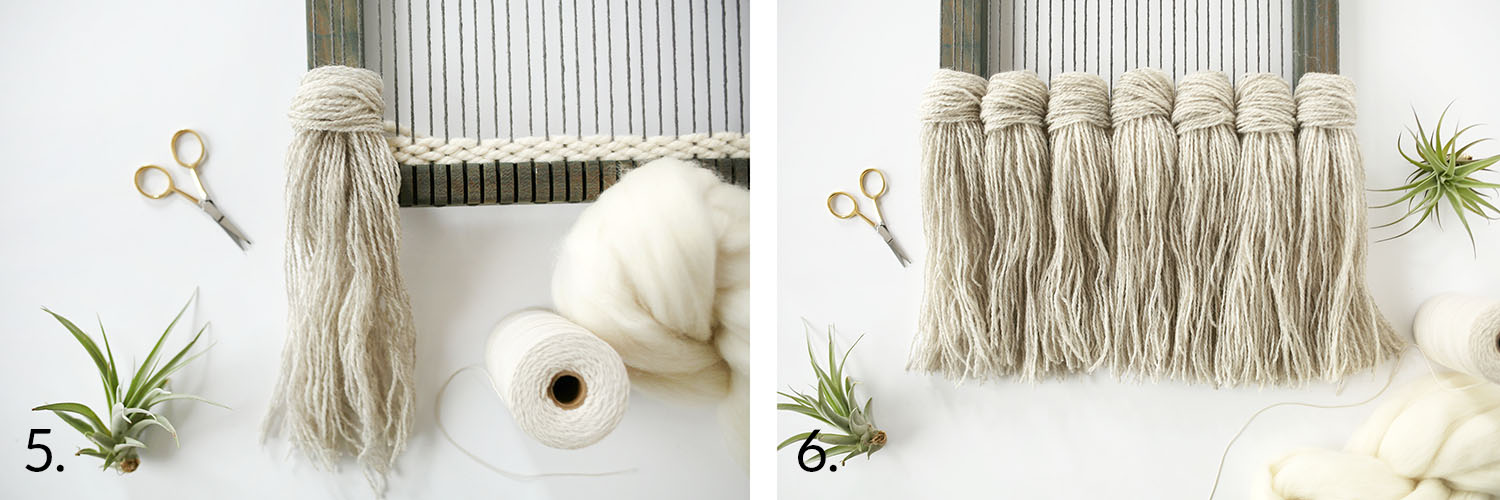 Step Five: Pull the ends of your bundle towards each other and adjust things so that they are centered and gently pull down. Your rya ‘knot’ should rest gently on top of the foundational plain weave you added in step one.
Step Six: Skip the fifth warp row and then repeat. This means your next bundle would wrap around the sixth warp row, skip the seventh and eighth, and then wrap the other way around the ninth. Once finished you’ll have a nice chunky fringe.
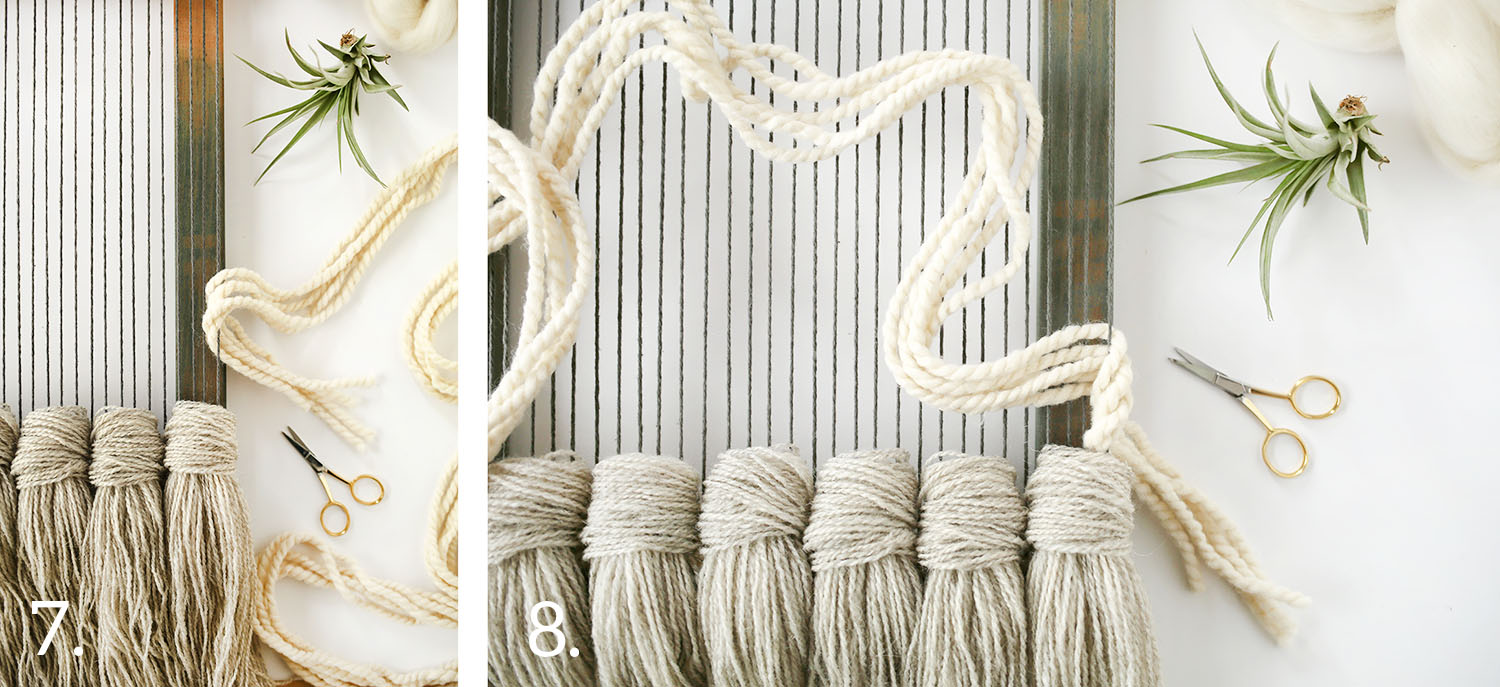 Step Seven: The next stitch is called soumak and will create a braided design. You can use one strand of yarn but using five will add a ton of texture and take up more space. This weave is all about going big!
Cut five strands of chunky yarn that are about 8′ long each. Tuck one end down between the outer warp row and the warp row next to it so that you leave a 4″ tail on the back side of your warp.
Step Eight: Wrap all five strands together around that outer warp row and bring it back up between the outer warp row and that second warp row as shown.
 Step Nine: Skip two warp rows and then wrap the entire bunch (all five strands together) over the top and around the fourth warp row. Make sure you pull it up above your wrap every time to keep things consistent.
Step Ten: Continue skipping two warp rows and then wrapping all the way around the next one. You should start seeing a stair step pattern.
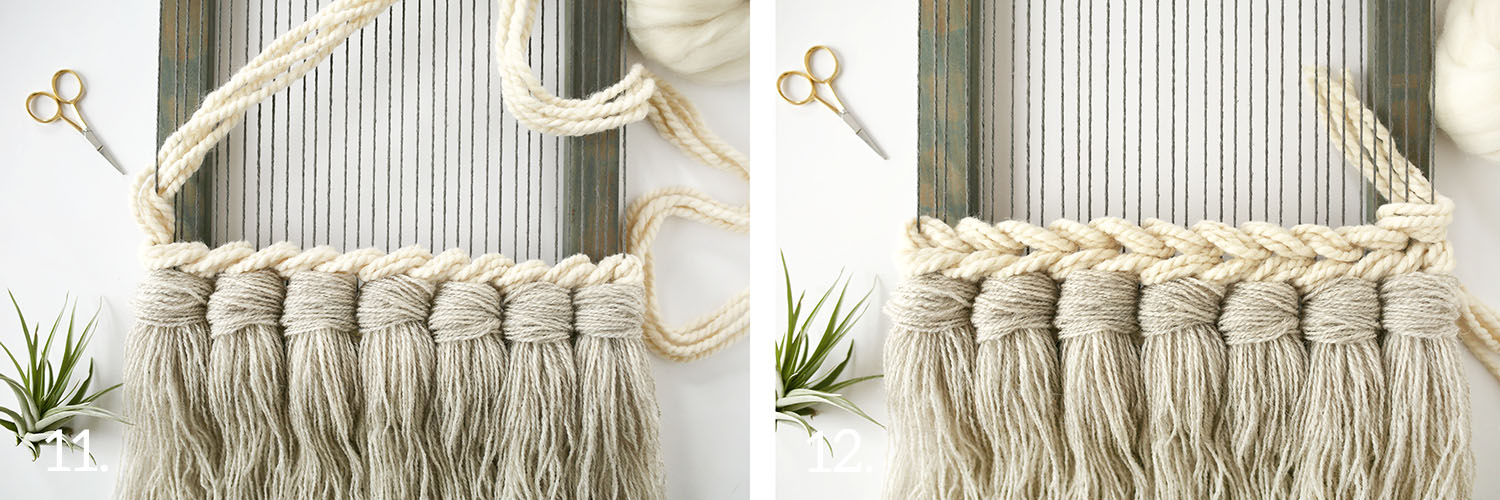 Step Eleven: Gently push your stair step pattern down so that it rests on top of the rya knots. You can adjust your tension on these to make sure they are consistently spaced out. See how they all slant in the same direction? When you get to the opposite end, wrap your bunch around the outer warp row twice to build up your height for the next row.
Step Twelve: When continuing your soumak in the opposite direction, continue to skip two warp rows and then wrap over the top of your next warp row. You’ll see how it starts slanting in the opposite direction of your first row. This creates the braided pattern. When you get back to where you started, tuck your tail ends around the outer row and act like you’re starting a regular weft row by going over and then under. This will tuck your ends down behind your warp again. Trim to end up with a 4″ tail.
 Step Thirteen: Count your warp rows and divide by eight. For this section, we’ll be weaving figure eights with wool roving. Each braided section will be split in half with four warp rows on one side and four on the other. If you have an extra warp row or two, you can add them in with a batch of four somewhere. You’ll want to use about 24″ of roving for each braided section.
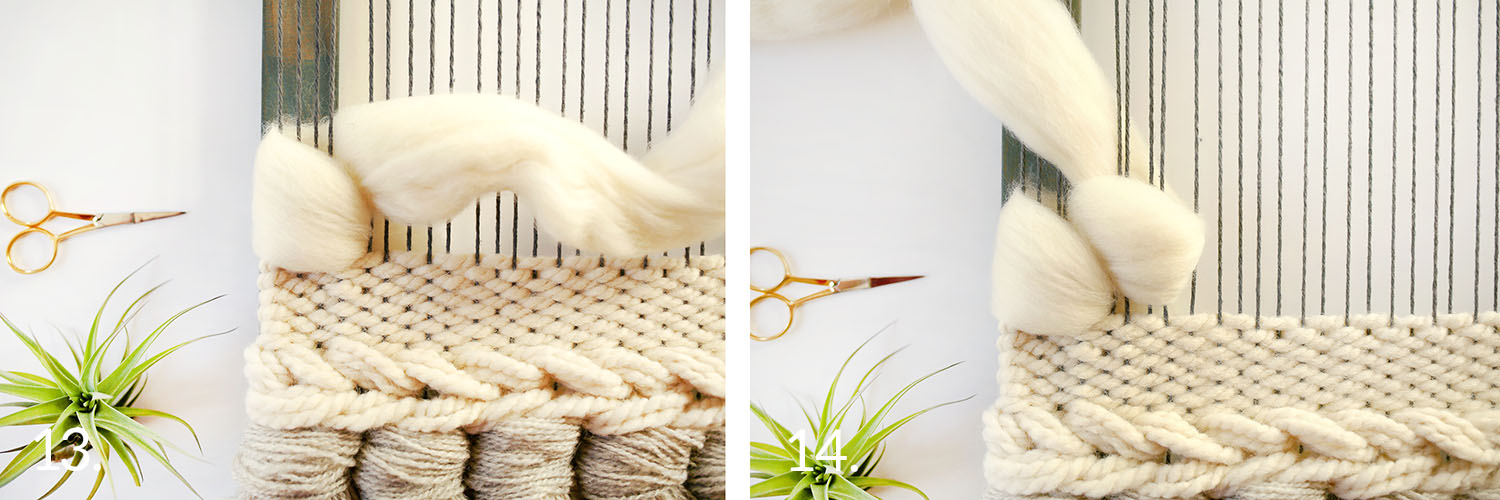
Starting on the left side of your loom, tuck about 3″ of your roving down between the fourth and fifth warp rows. Then wrap the long end of your roving all the way around the four warp rows closest to the edge and back up between the fourth and fifth warp rows.
Step Fourteen: Then wrap your roving over warp rows 5-8 and back between the fourth and fifth warp rows. Essentially you are wrapping around the first four warp rows and then the next four warp rows back and forth to create a vertical braid.
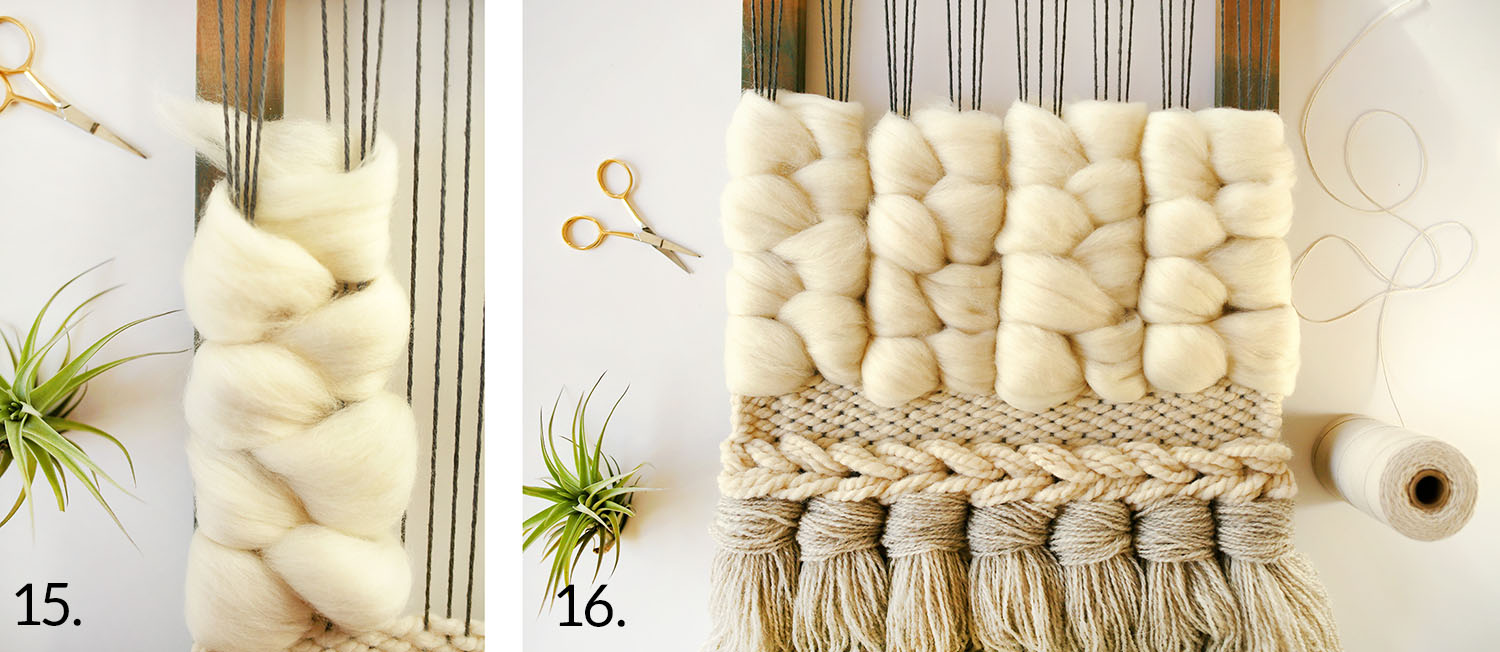 Step Fifteen: Finish with an even braid, meaning you’ve wrapped around both sections of warp rows an even amount of times. Then tuck your tail up between the sixth and fifth warp rows and then back down between the fifth and fourth. This will ensure your tail gets woven in and secured without it showing.
Step Sixteen: However many times you braided on your first vertical row is how many you should braid on the rest of your rows. Feel free to fluff your braids so that they are consistent. This takes up a big section of your warp and adds tons of texture. The best part is it doesn’t take very long to weave!
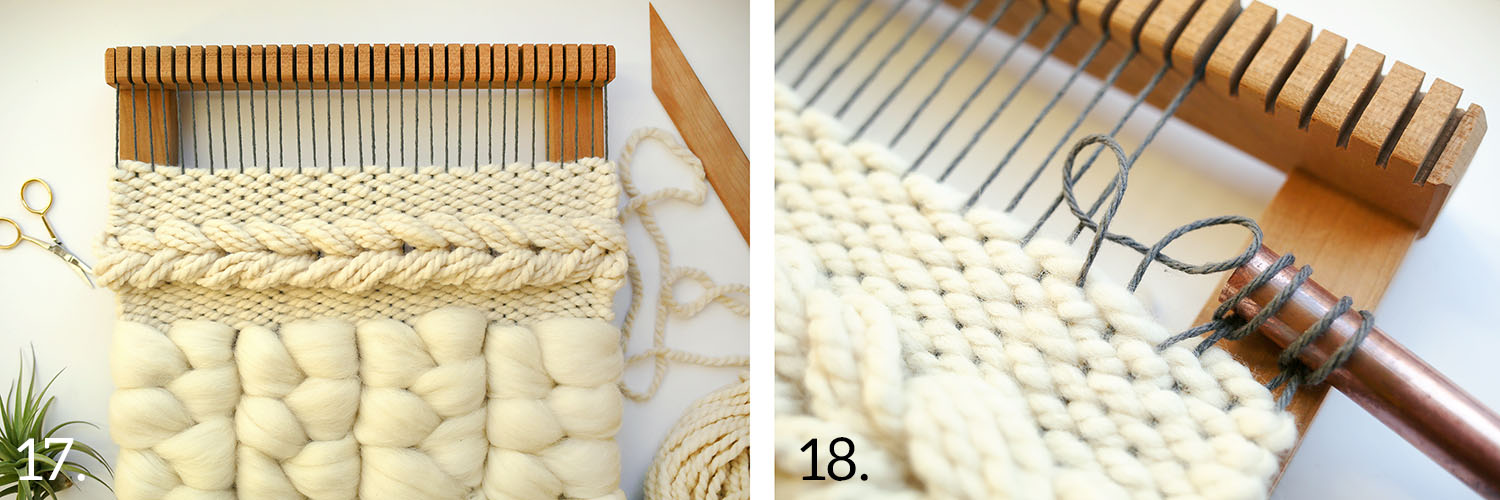 Step Seventeen: Add a section of plain weave above your braided roving rows. I think I added about 10 weft rows (each horizontal row is a weft row). Then add another two rows of soumak using the same length and amount in step seven. This keeps it balanced and consistent. Then frame out the other side of your soumak with 10 or 12 more weft rows of plain weave in the same chunky yarn.
Step Eighteen: You may not want to weave to the top of your loom every time. No worries! Gently pull individual pairs of warp rows off of the top notches. Create a lark’s knot by folding the warp yarn back behind itself.
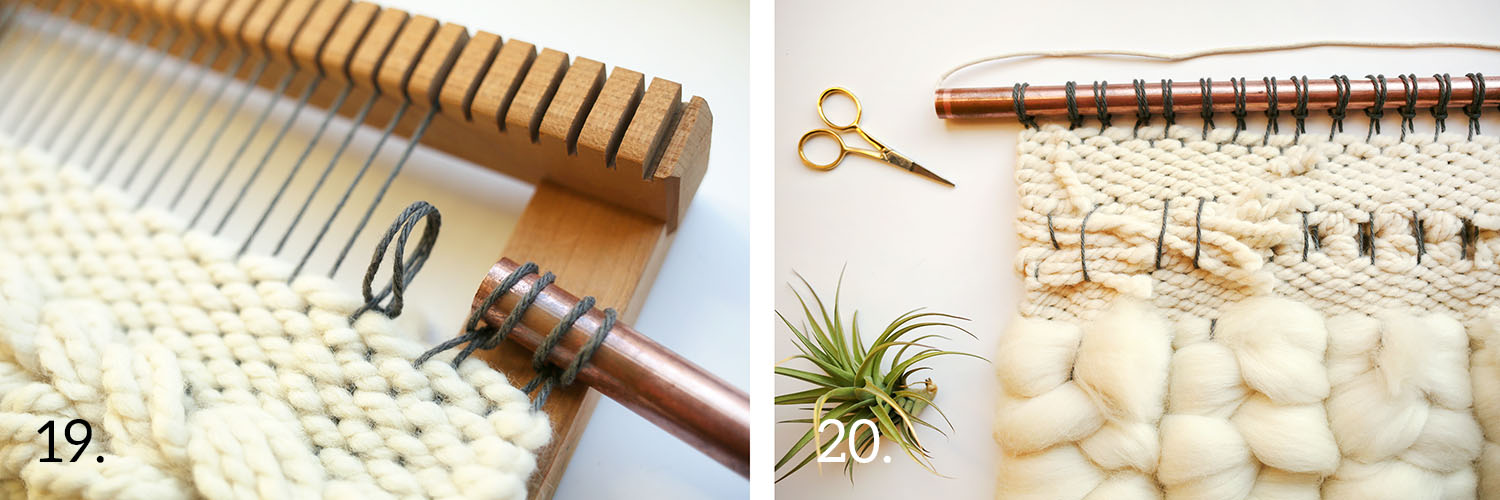 Step Nineteen: Then bring the two loops together in front. Then slip this loop over your copper pipe or wooden dowel. Do this one at a time and don’t pull your warp rows too much. You don’t want things shifting as you’re taking it off of the loom. Then gently pull it off of the bottom of the loom. Tie each of the loops at the bottom into little knots to keep things from shifting down too much.
Step Twenty: Once your pipe is added, add a hanger by slipping a 3′ length of cotton yarn through the pipe. Tie a double-knot and then hide the knot somewhere in the center of the pipe. Flip your wall hanging over and tuck your soumak tails behind the exposed warp rows. Trim your roving tails so they aren’t too fluffy. These will stay put.
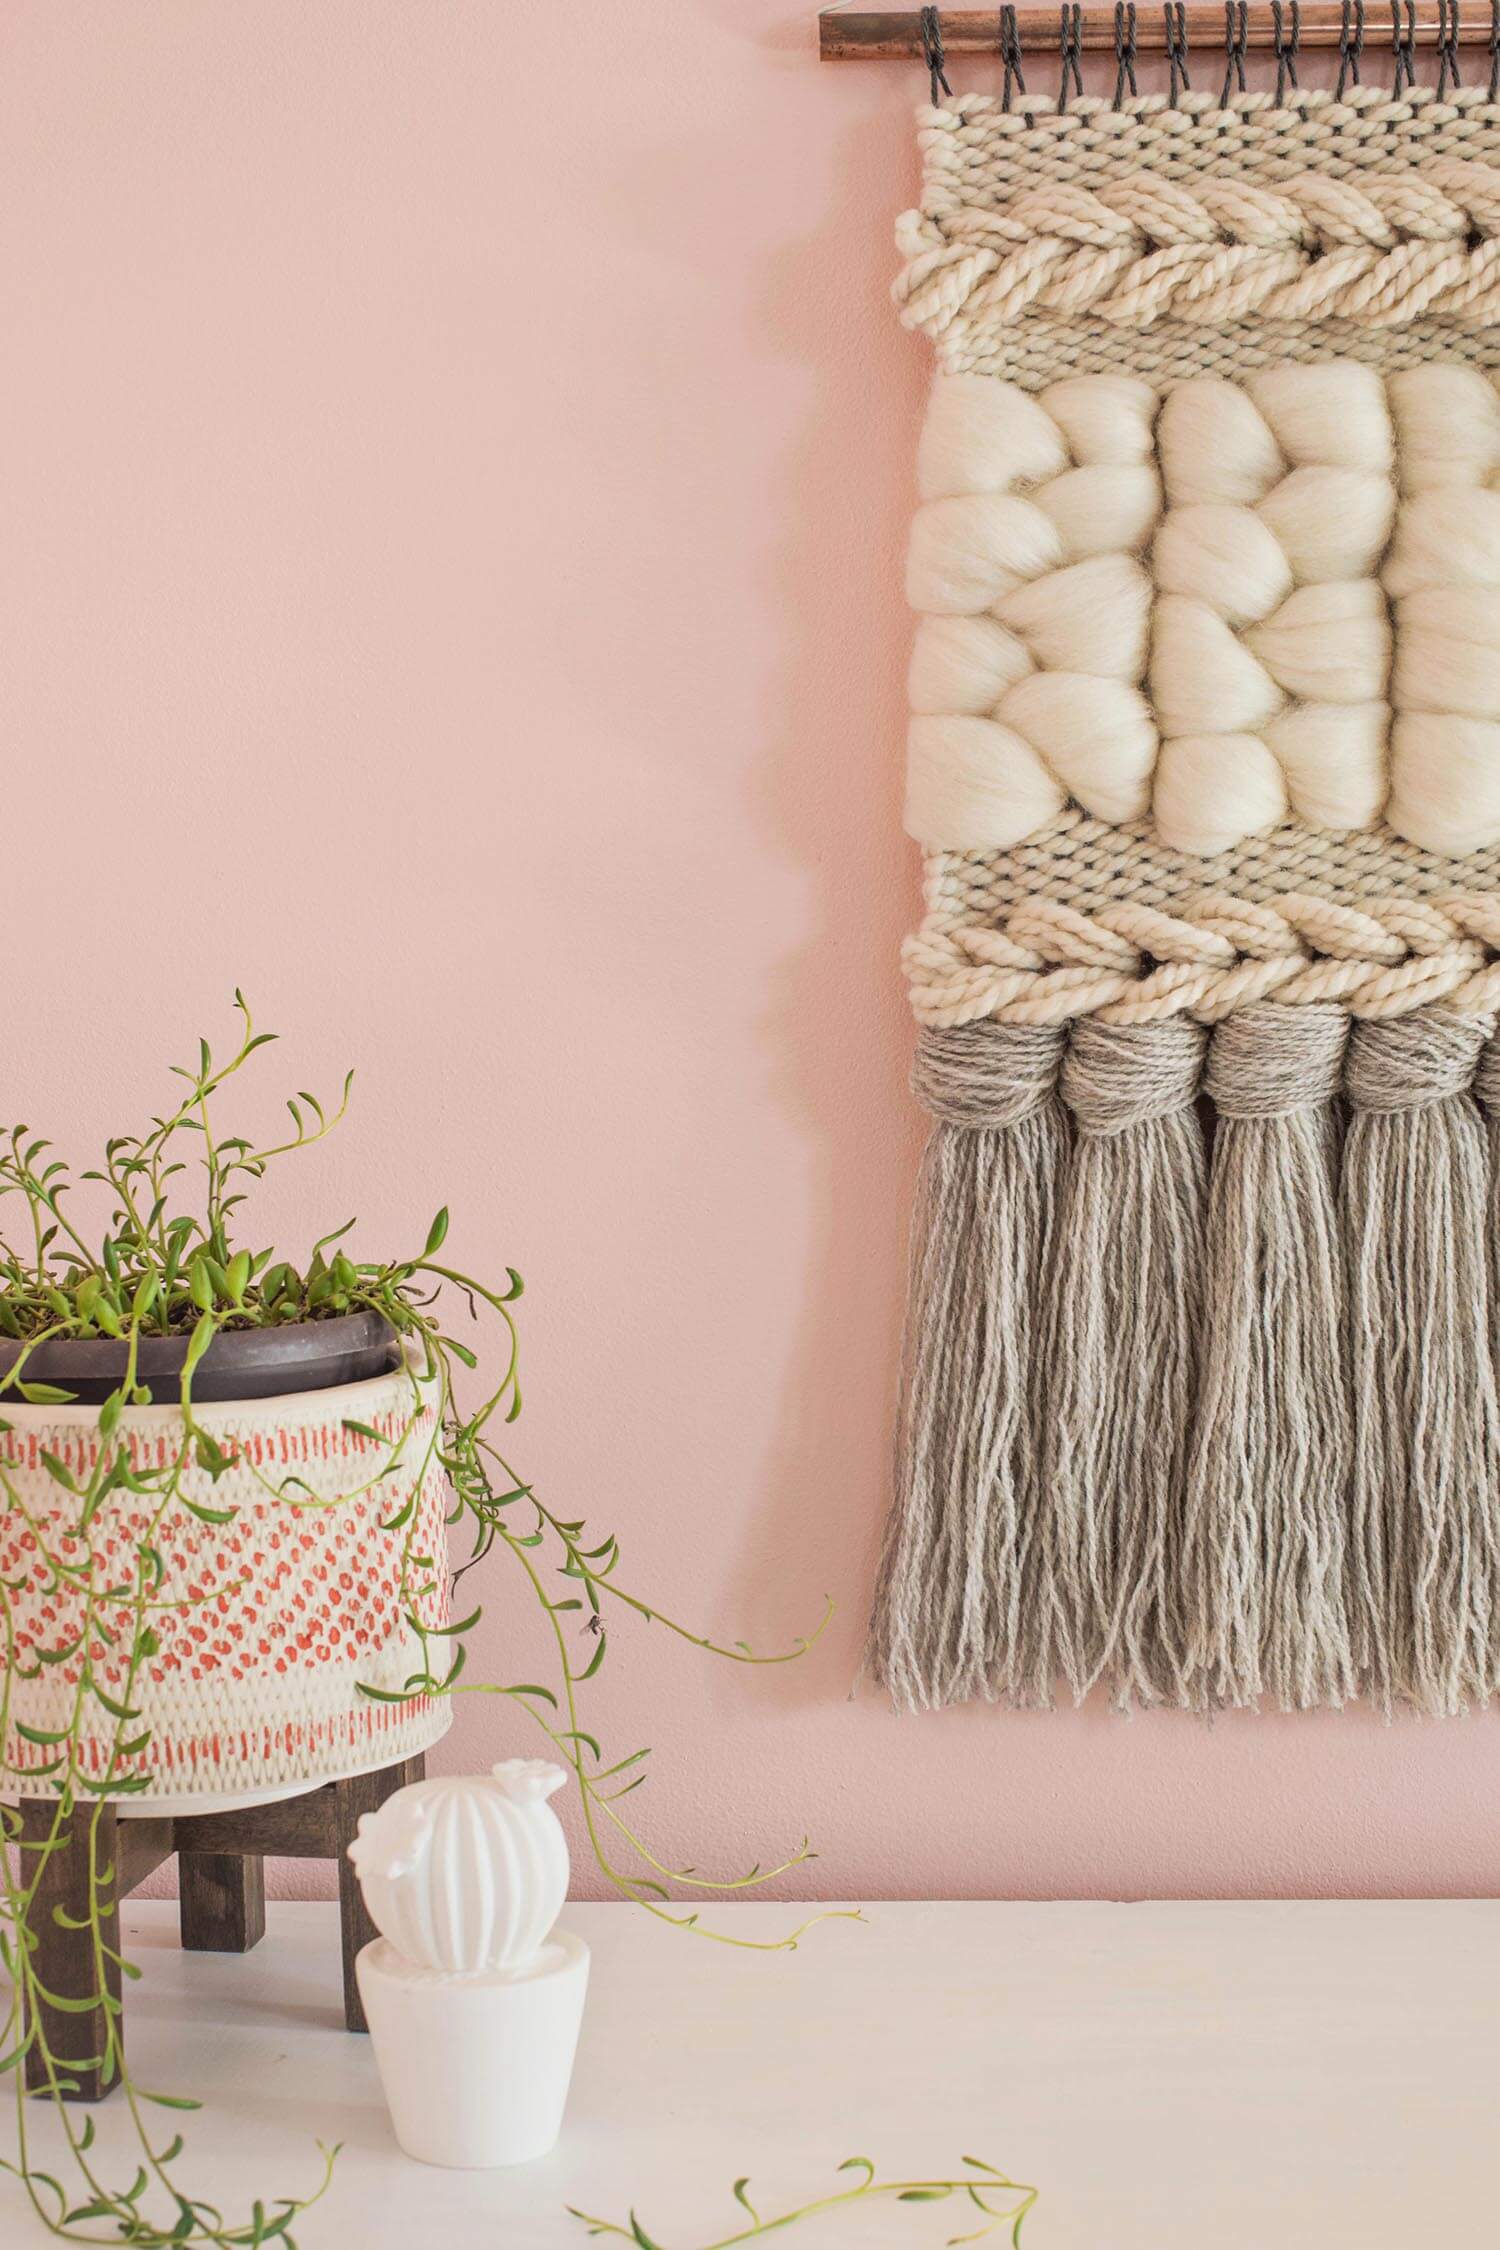 After I’m finished with any wall hanging I like to hang it on a hook and brush through the rya knots with my fingers or a weaving comb to straighten things out a bit. Then I trim up my scraggly ends for a more finished look. Congrats! You’ve just finished a beautiful wall hanging in half the time it can take because you used the chunkiest of fibers!
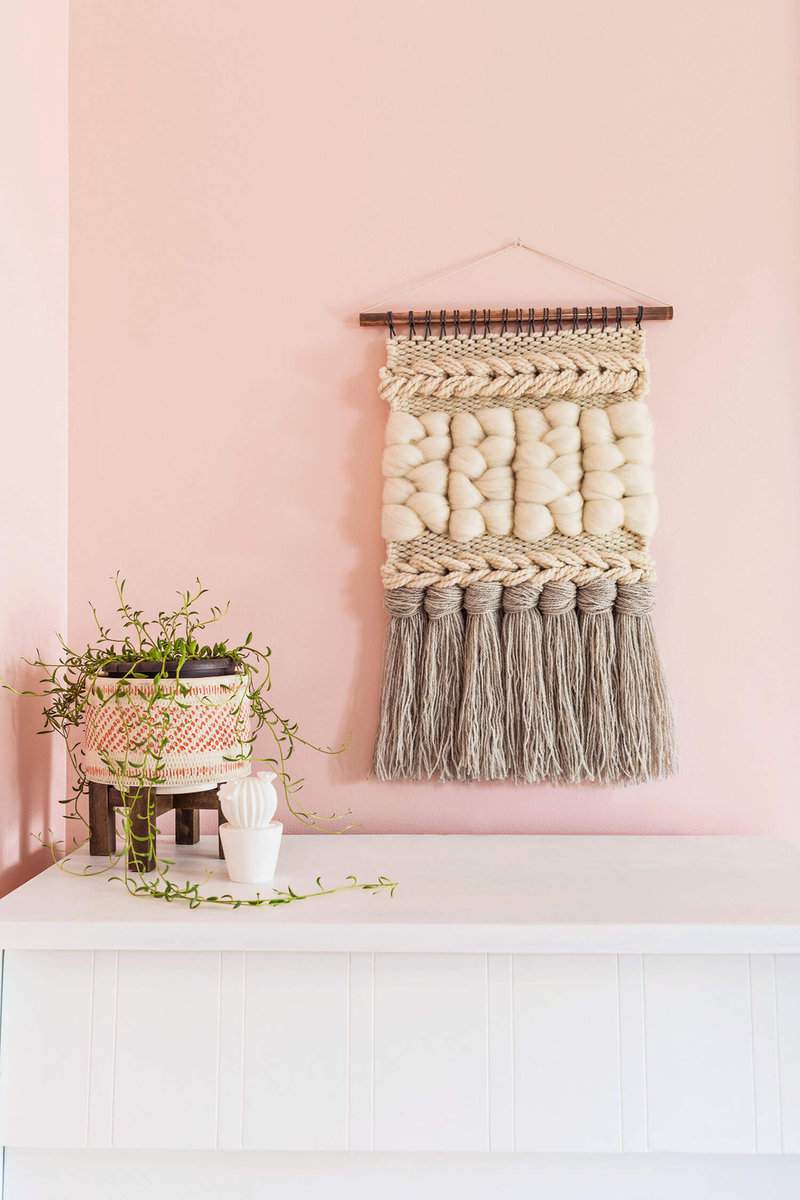
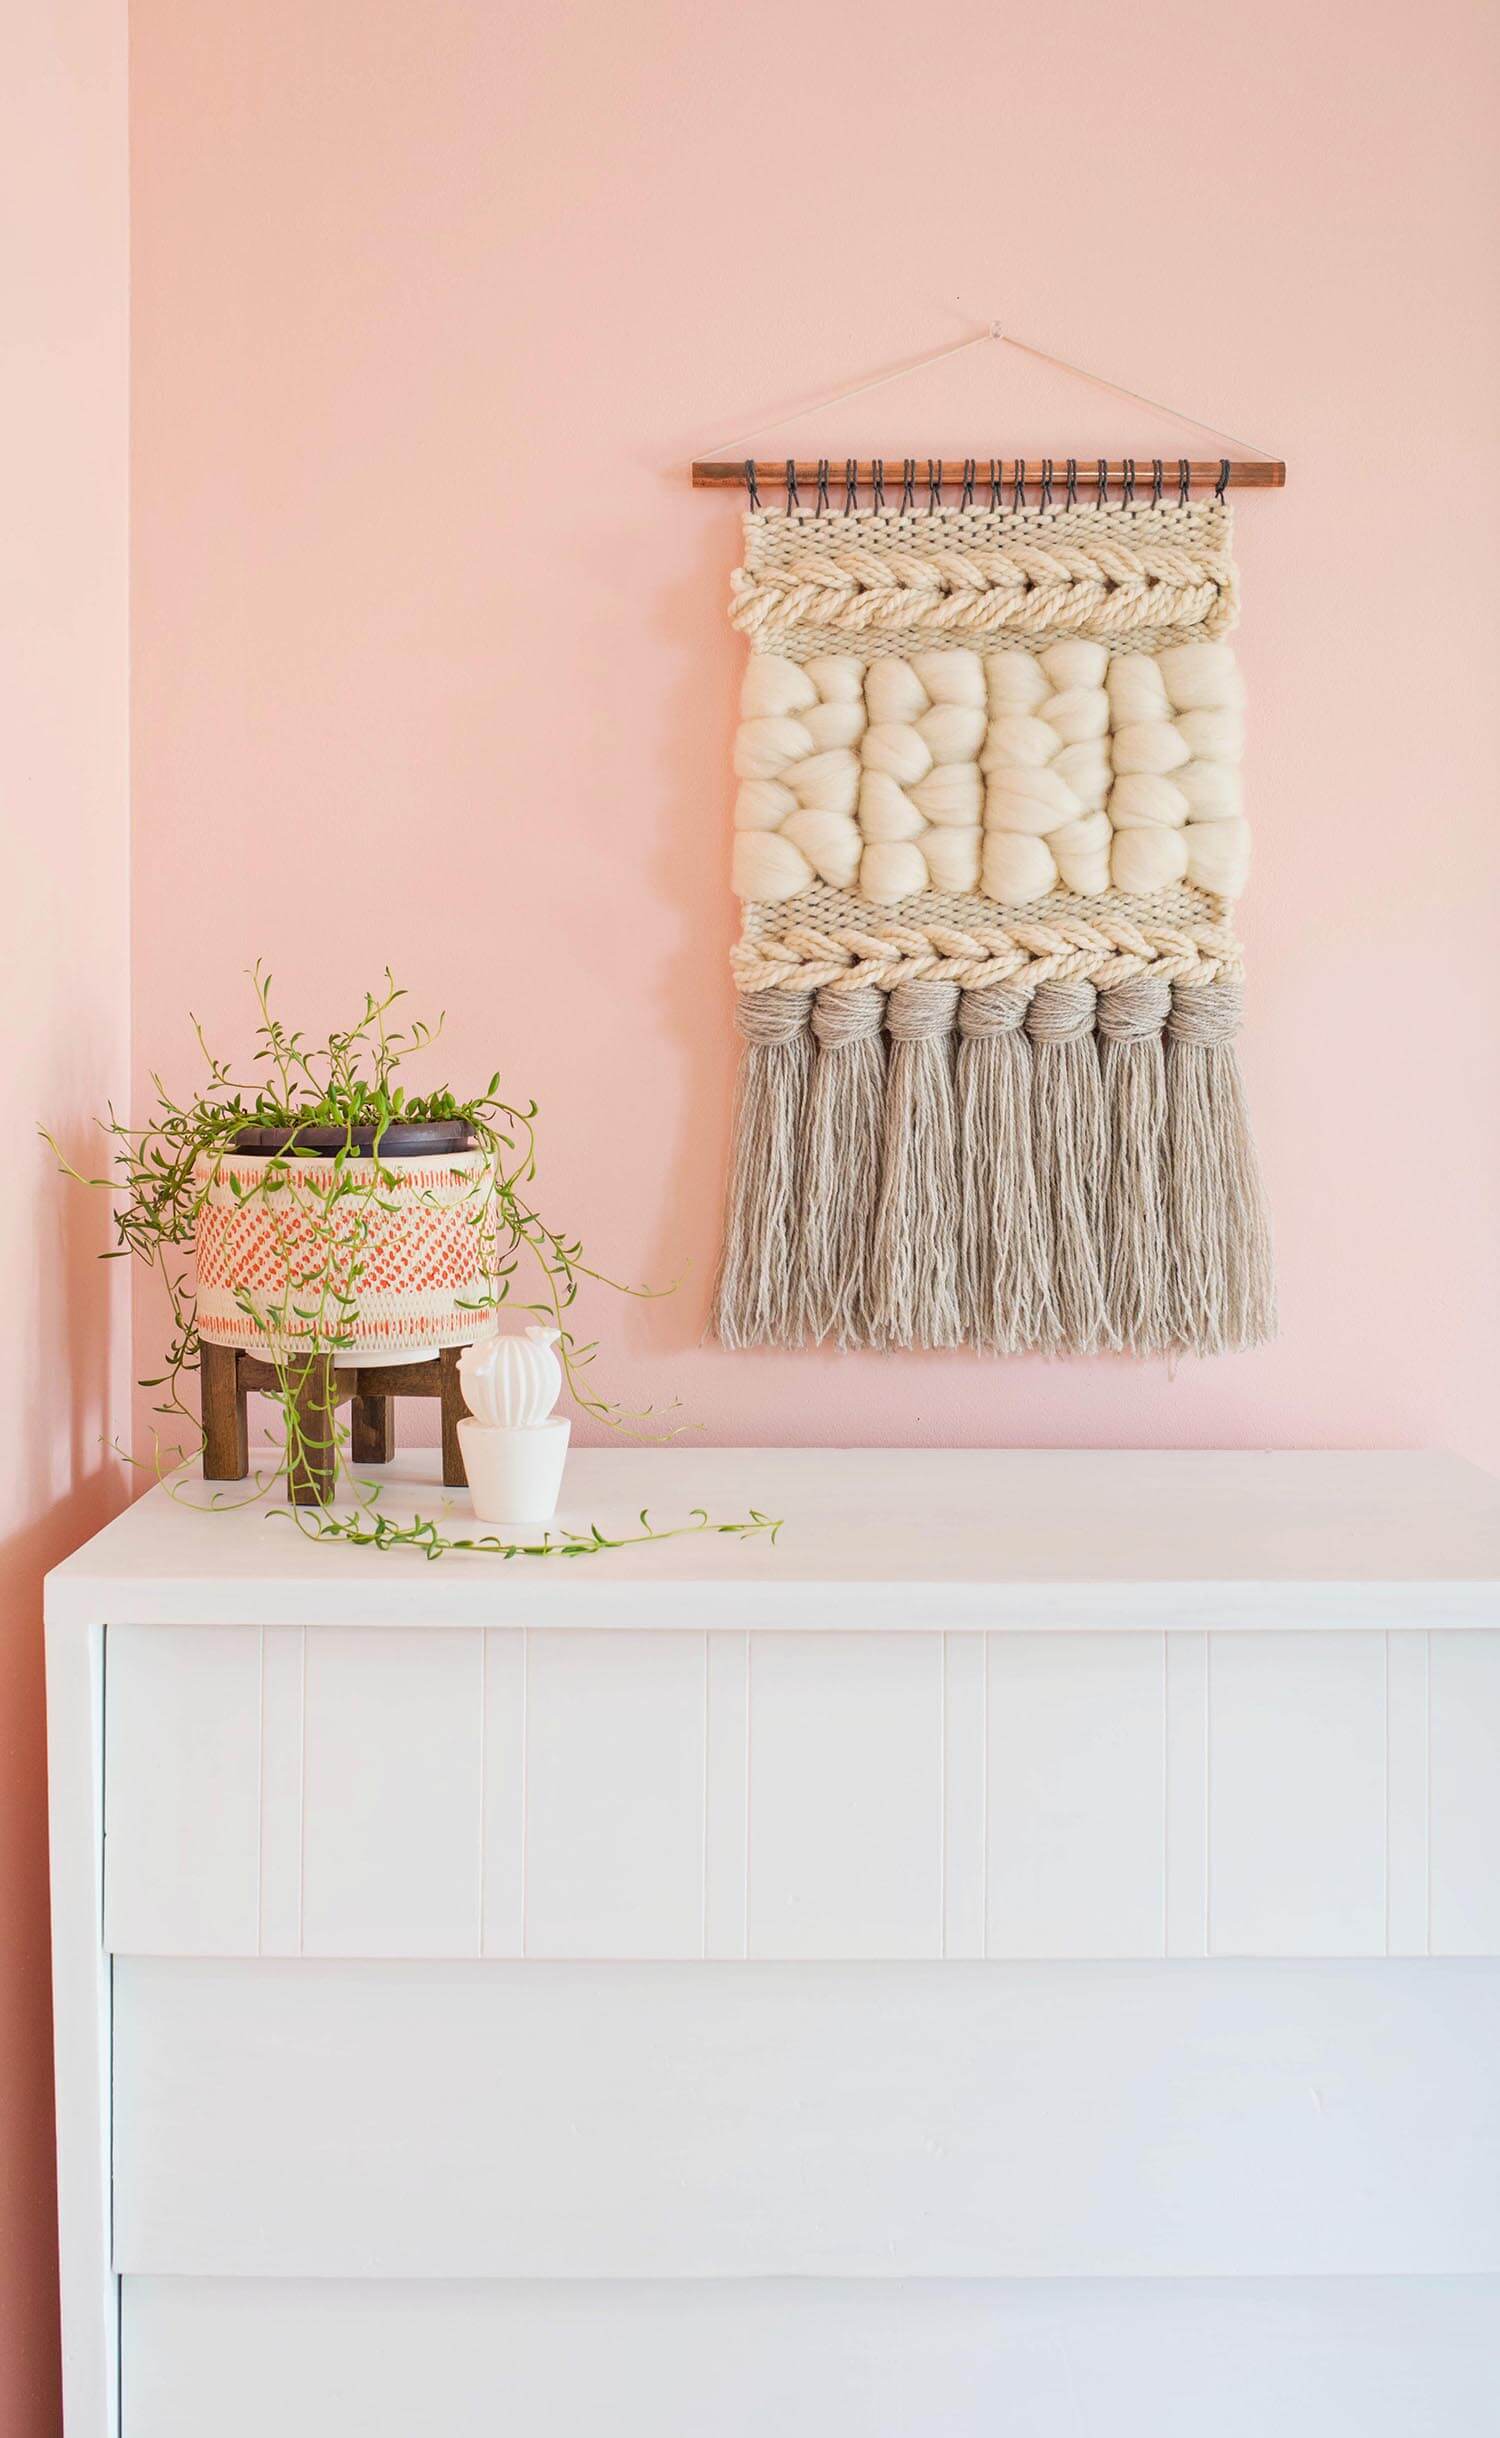 Find the perfect place for your wall hanging and enjoy! – Rachel
Want to learn more about weaving or try a few more complex designs? Check out my book, DIY Woven Art, for 15 projects that take you from the most basic designs to weaving your own rug! No lie.